Voicemail records messages when you are unavailable. Messages are saved as digital audio files and can be sent via email with transcriptions.
1. Redirect your call to voicemail
Redirect calls to voicemail to ensure callers can leave a message when unanswered, and improve response management and customer satisfaction.
Here is how to do it:
Log in > click "Settings" (gear/cog wheel) > then "My Settings".
Scroll down to “User-Based Call Routing” and click “Show”.
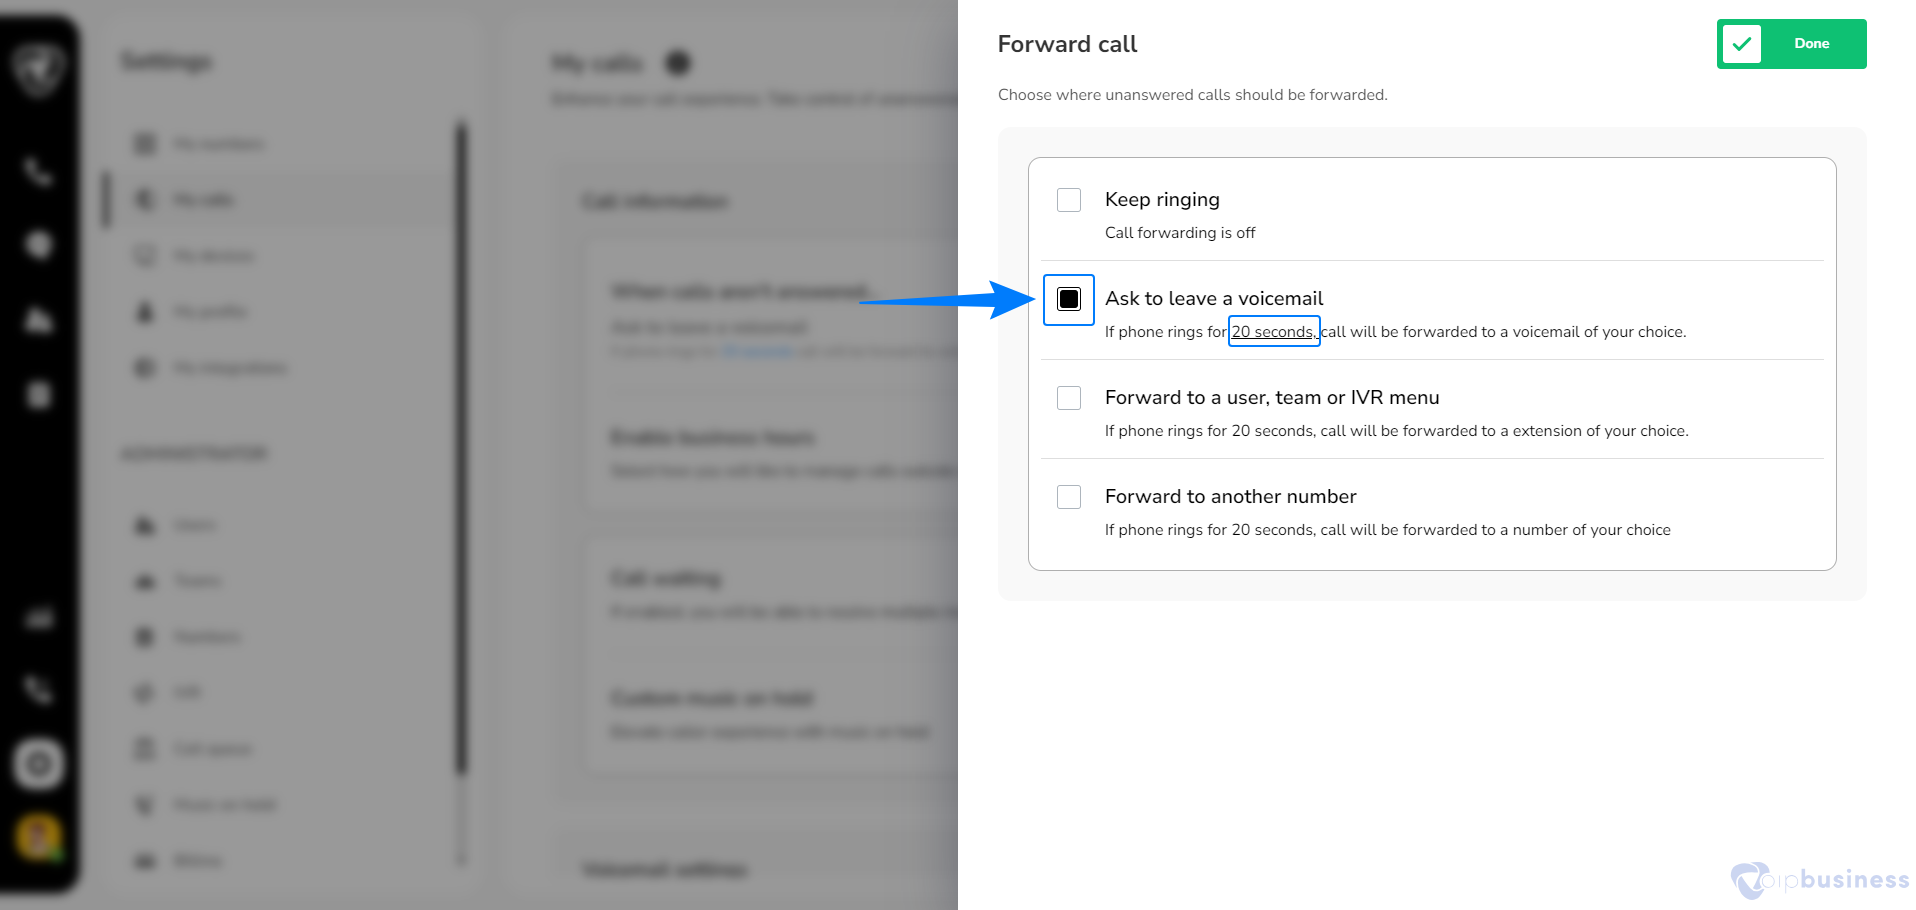
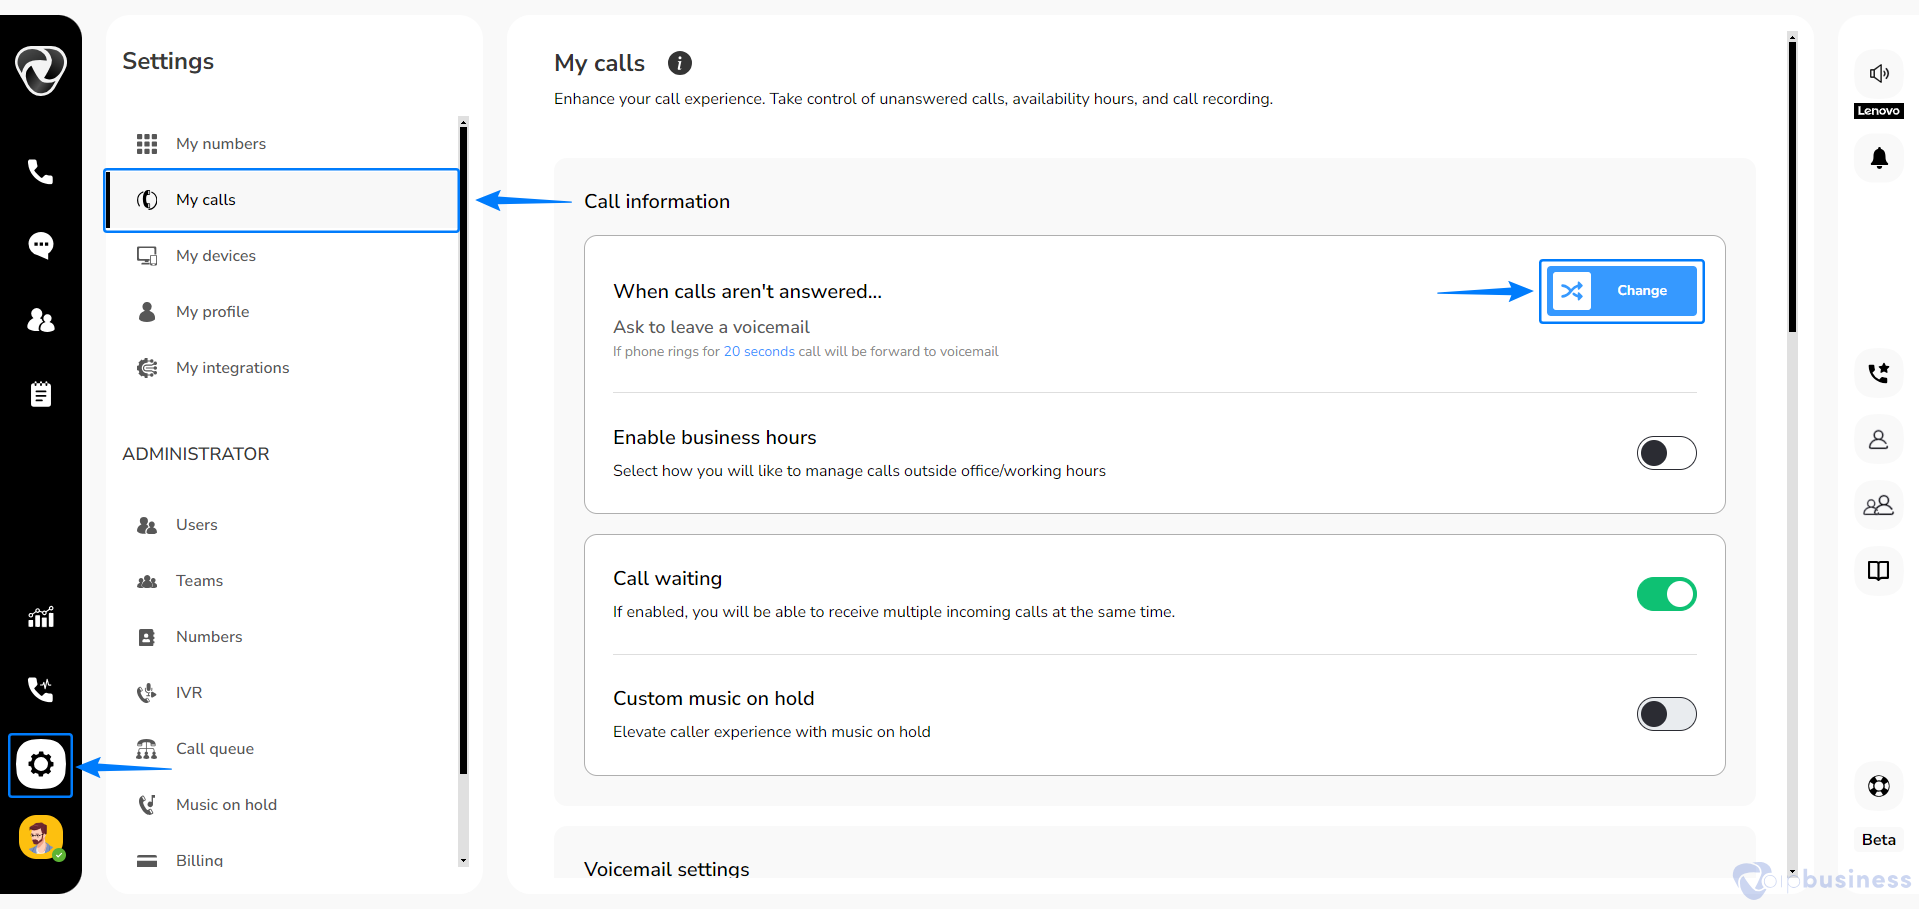
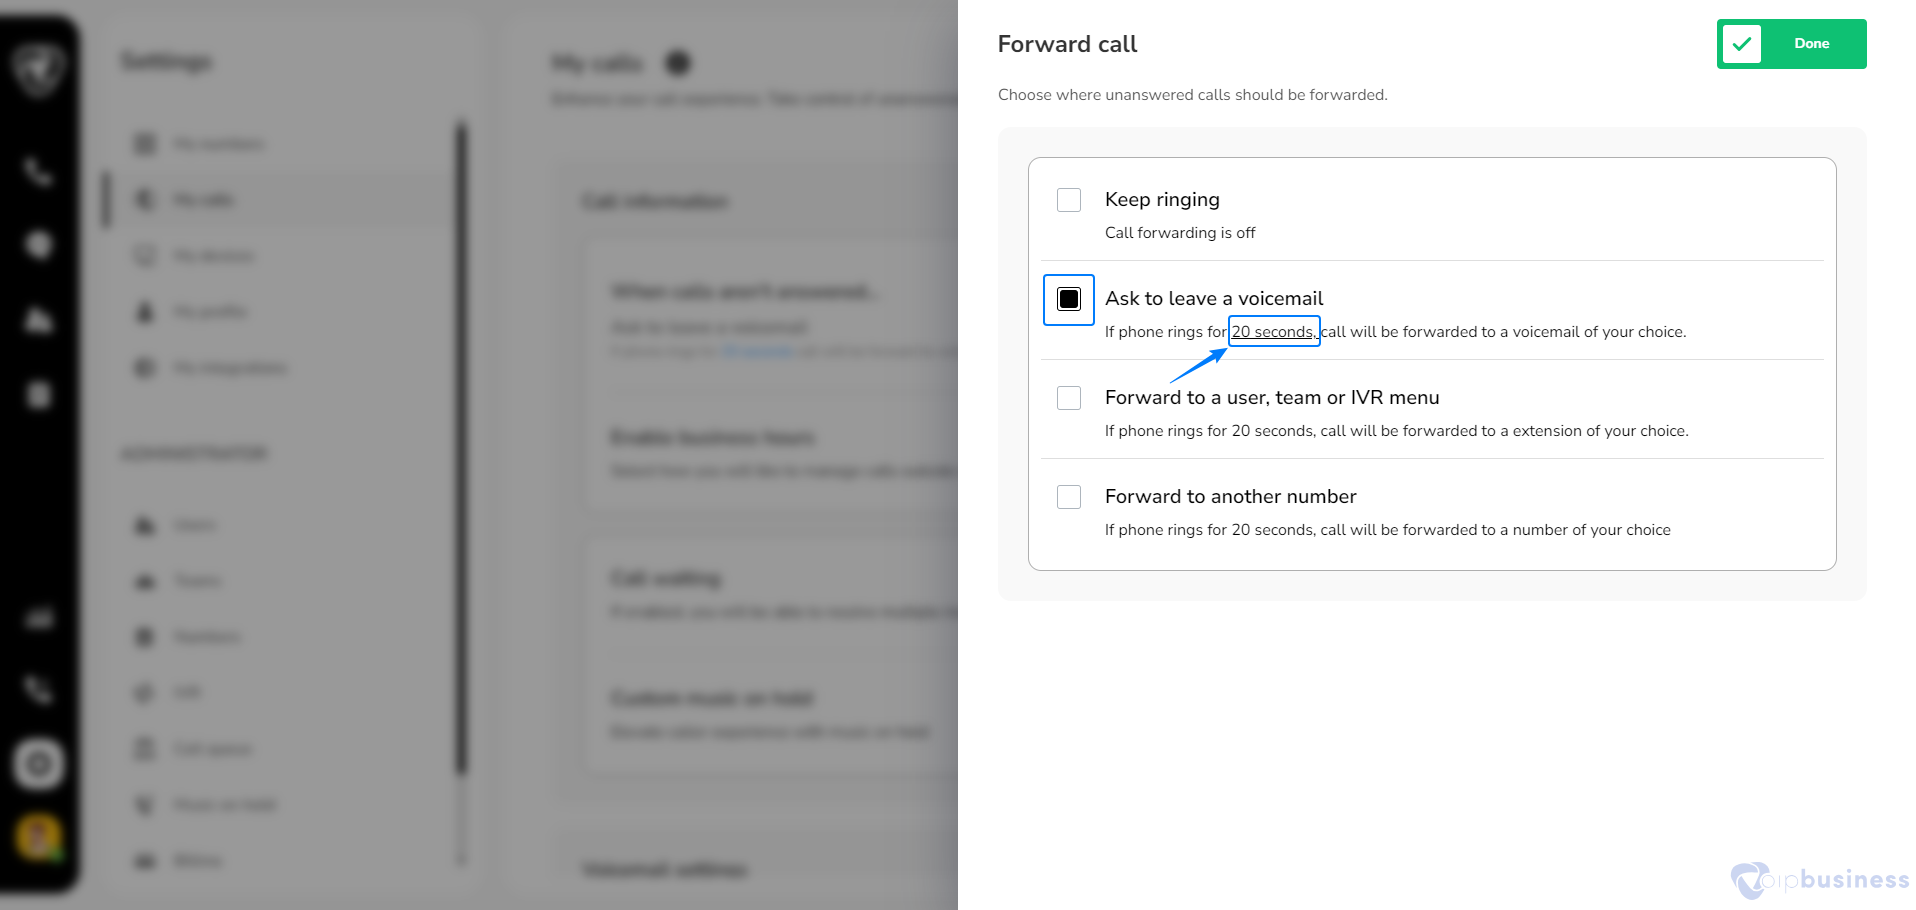
Click “Change” next to “When calls aren’t answered”.
Select “Ask to leave a voicemail”, then click “Done”
Example:
Suppose you are often in meetings and can not always answer calls. To ensure you do not miss important messages, set up Call Redirection to Voicemail:
Log in and navigate to “Settings” > “My Settings.”
Scroll to “User-Based Call Routing” > click “Show.”
Next to “When calls aren’t answered,” click “Change.”
Select “Ask to leave a voicemail” and click “Done”.
2. Set Voicemail Greetings
You can use the default greeting or create a personalised one by recording or uploading your own message.
To set your voicemail greetings follow the steps below:
Go to “My Settings”.
Scroll down to “User-Based Call Routing” and click “Show”.
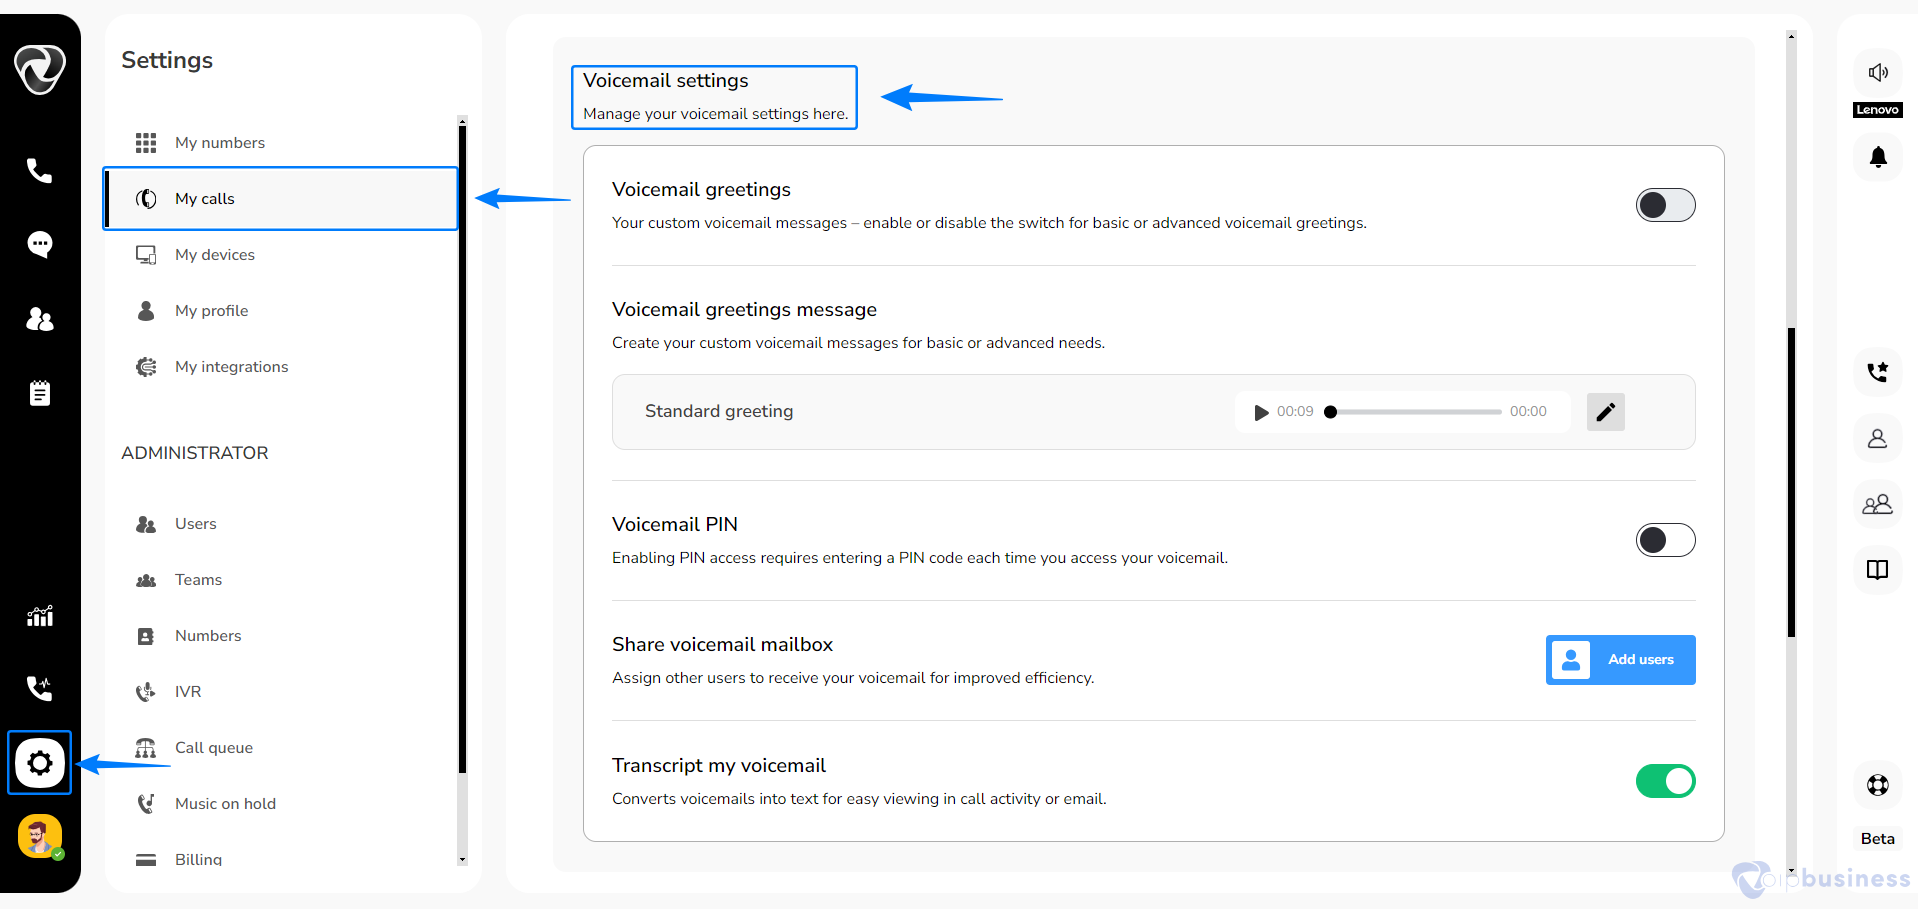
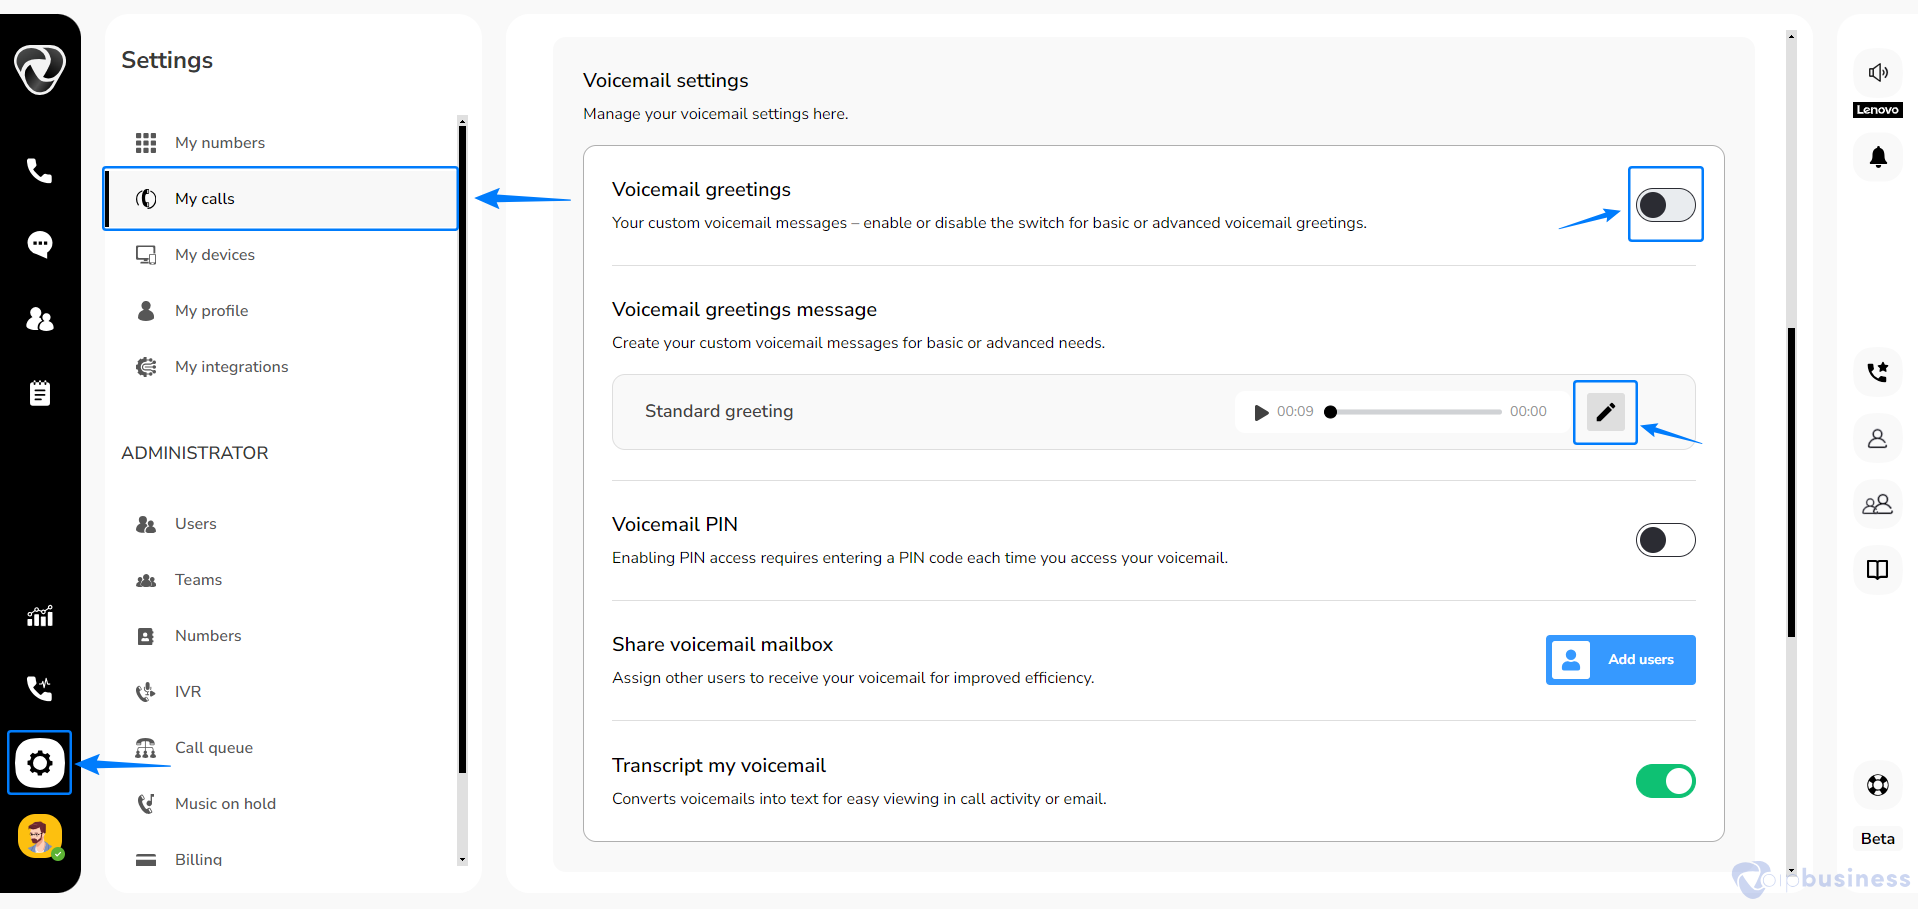
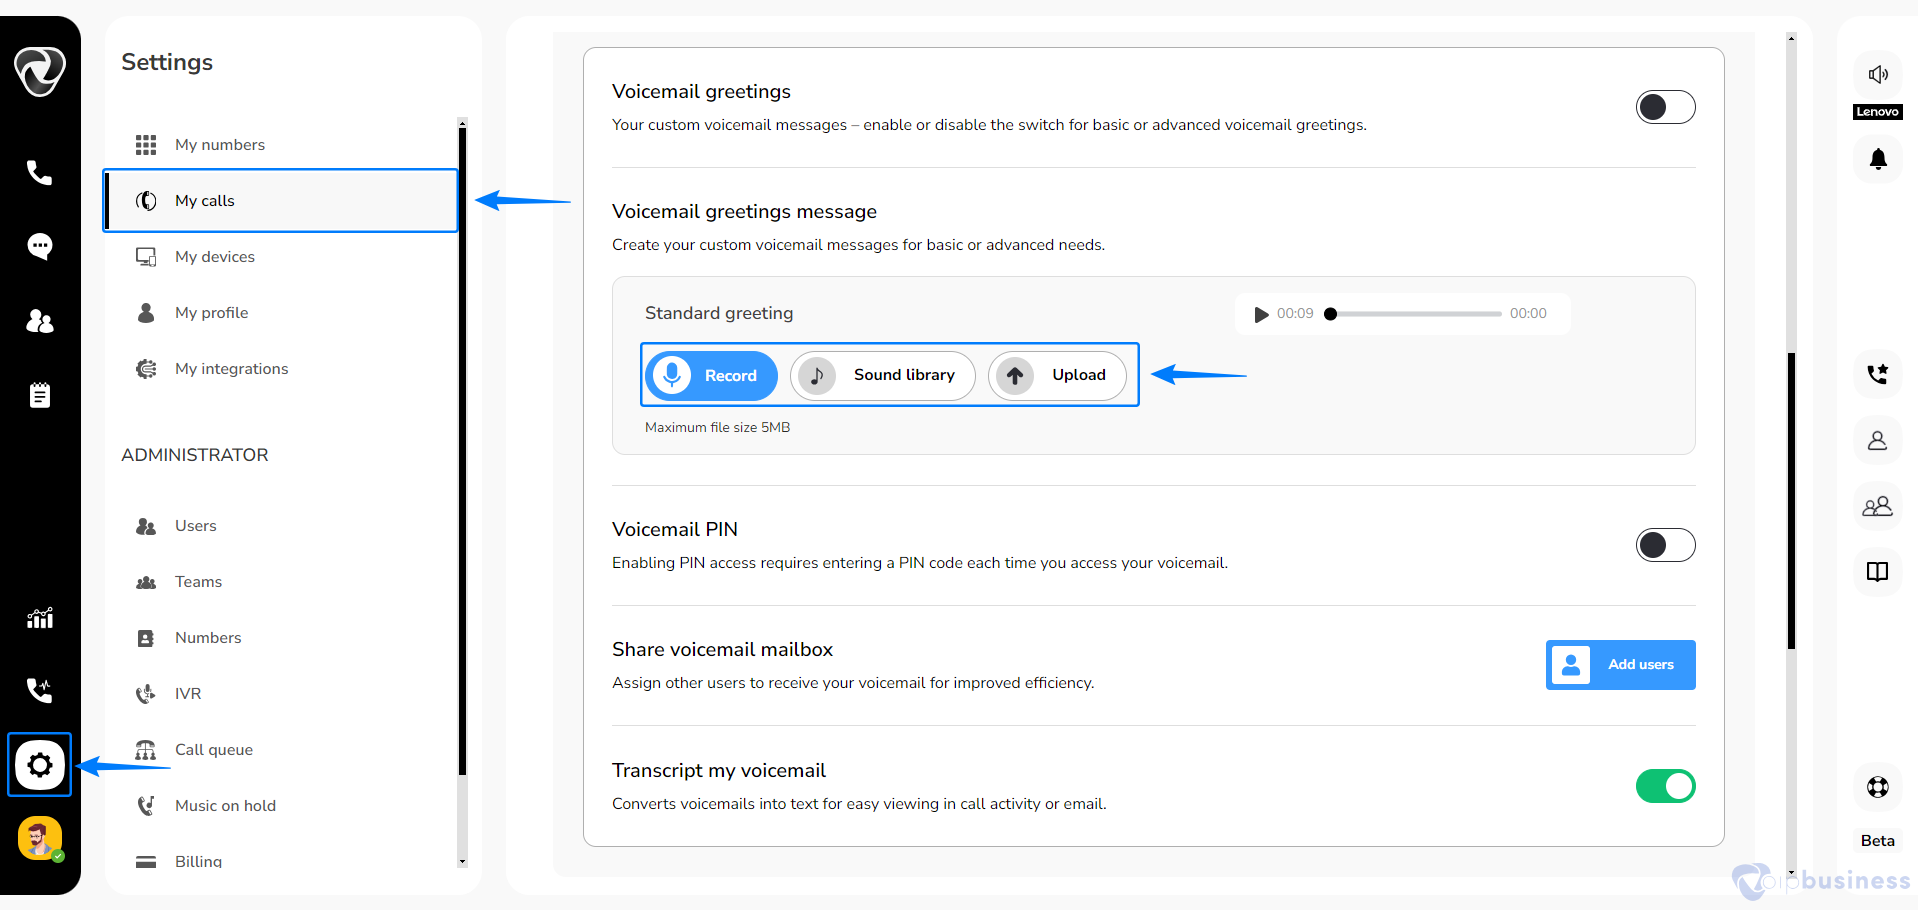
Navigate to “voicemail settings”.
Set “voicemail greetings to “On”.
Customise “voicemail greeting messages”
Hover on “standard greetings” and on the right side click “Edit icon”
Select option from “Record”, “Sound library”, or “Upload”.
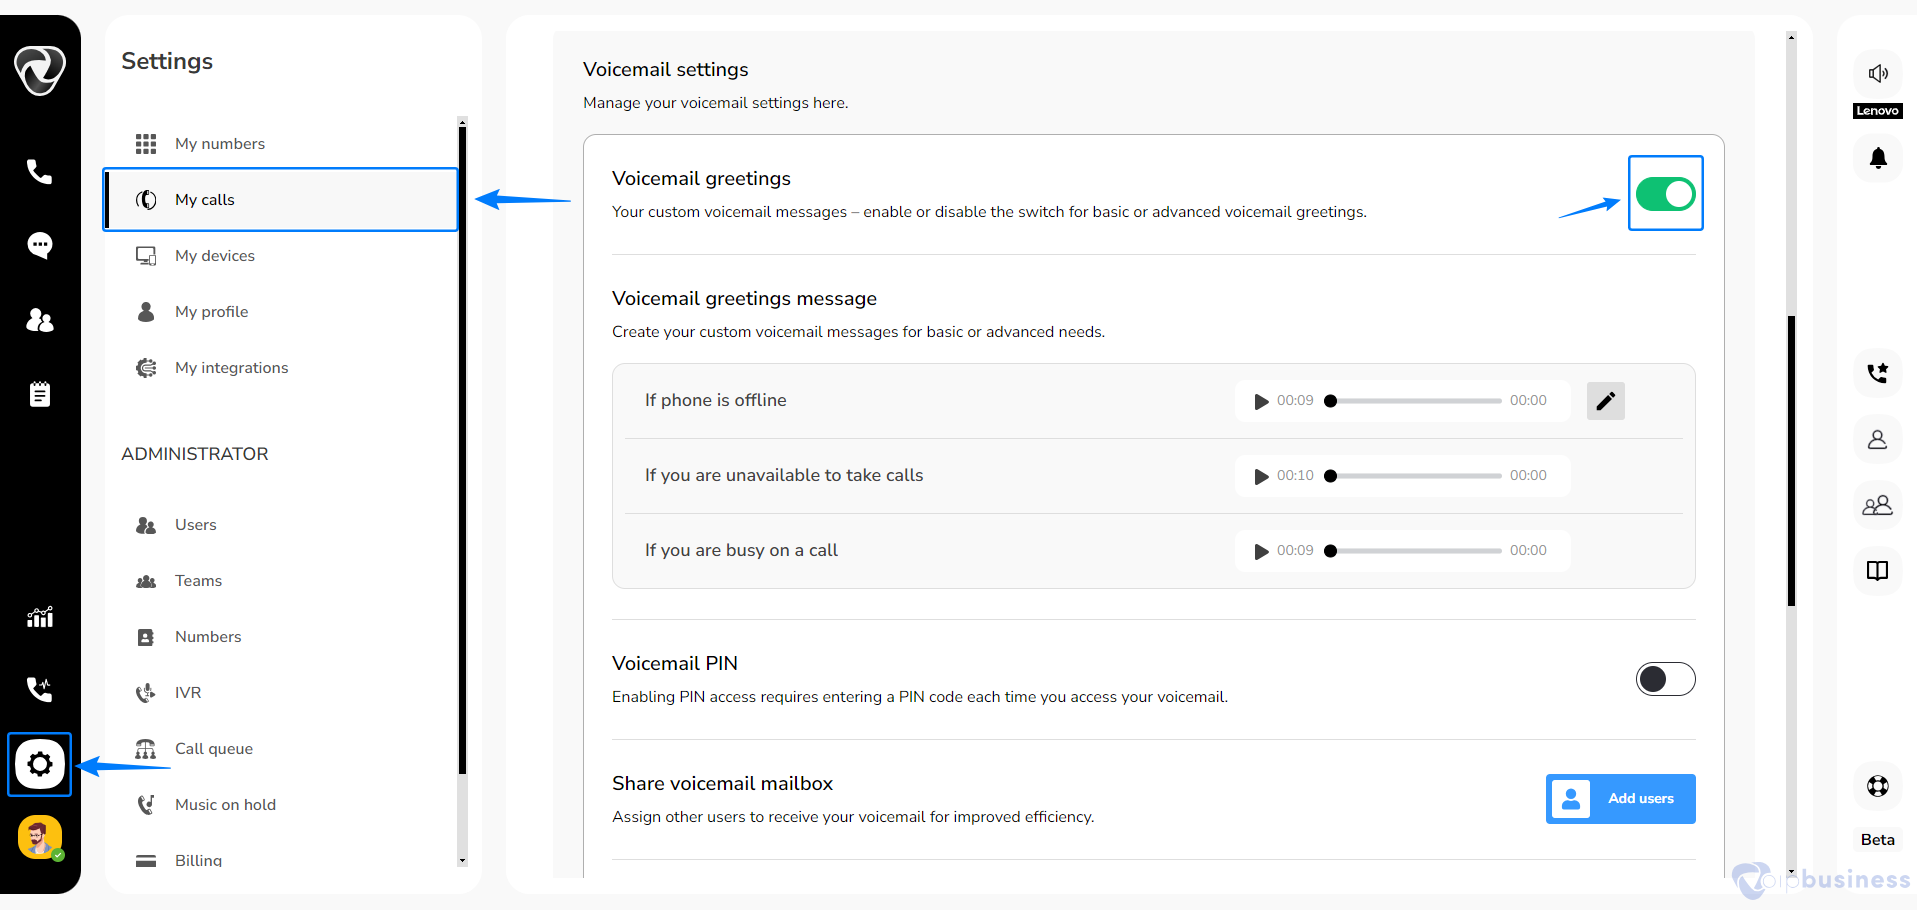
Custom voicemail greetings by setting “Voicemail Greetings" to "On".
Following options appeared:
Busy (Busy on the phone) – When the person is already on another call
Unavailable (Unavailable to take calls)– When a call rings and they are unavailable
Offline (Phone is offline) – When the phone’s off or set to DND (Do Not Disturb)
Click on “Edit” icon on any of the sound file to customise greetings.
Example:
If you want to create a professional voicemail greetings for clients when you are unavailable, set up personalized voicemail messages:
Navigate to “My Settings” and click “Show” under “User-Based Call Routing.
Now go to “Voicemail Settings” and turn “Voicemail Greetings” On.
Customise your voicemail greeting message by hovering over “Standard Greetings” and clicking the Edit icon.
You can select from “Record” (to record her own message), “Sound Library” (to choose a pre-recorded option), or “Upload” (to add a custom audio file).
3. Voicemail Delay
Set how long the phone rings before the call goes to voicemail by following the steps below:
Go to “My Settings”.
Scroll down to “User Based Call Routing”.
Click “Show”, then “Change” under “When calls aren’t answered”.
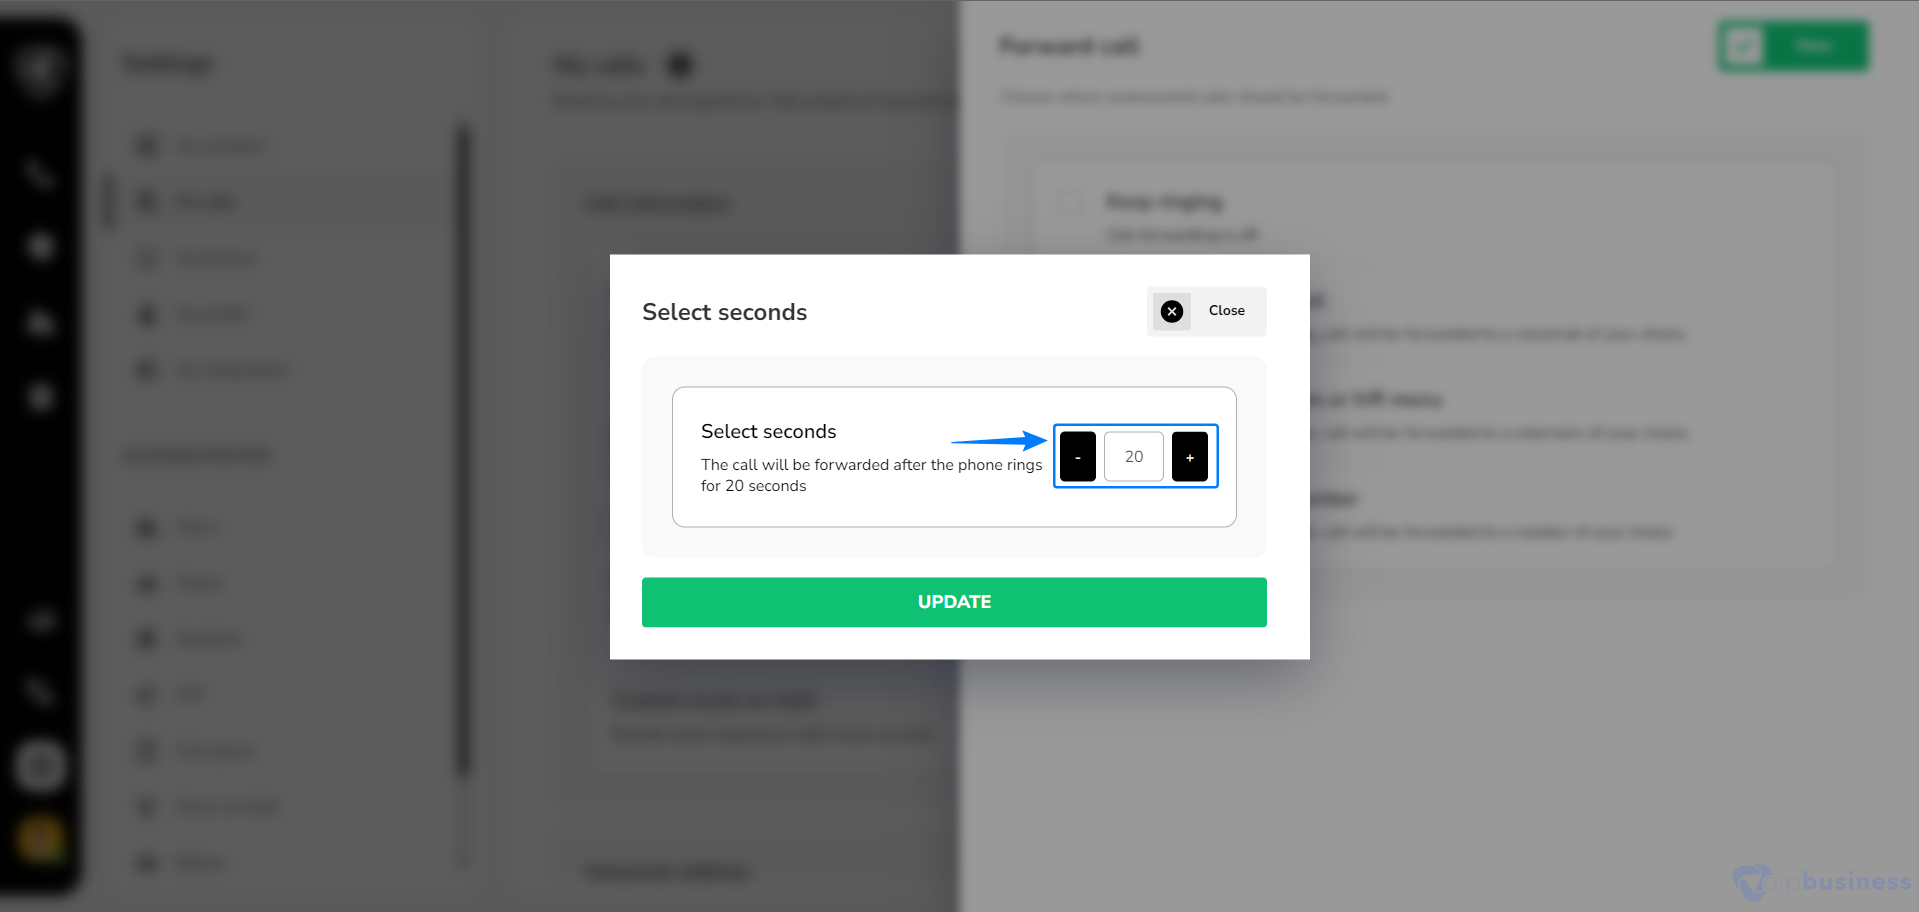
Click on “Seconds” before voicemail is activated.
Adjust time as per your preferences and click “Update”
On the next screen, select “Ask to leave a voicemail” and adjust the delay time by clicking on the seconds.
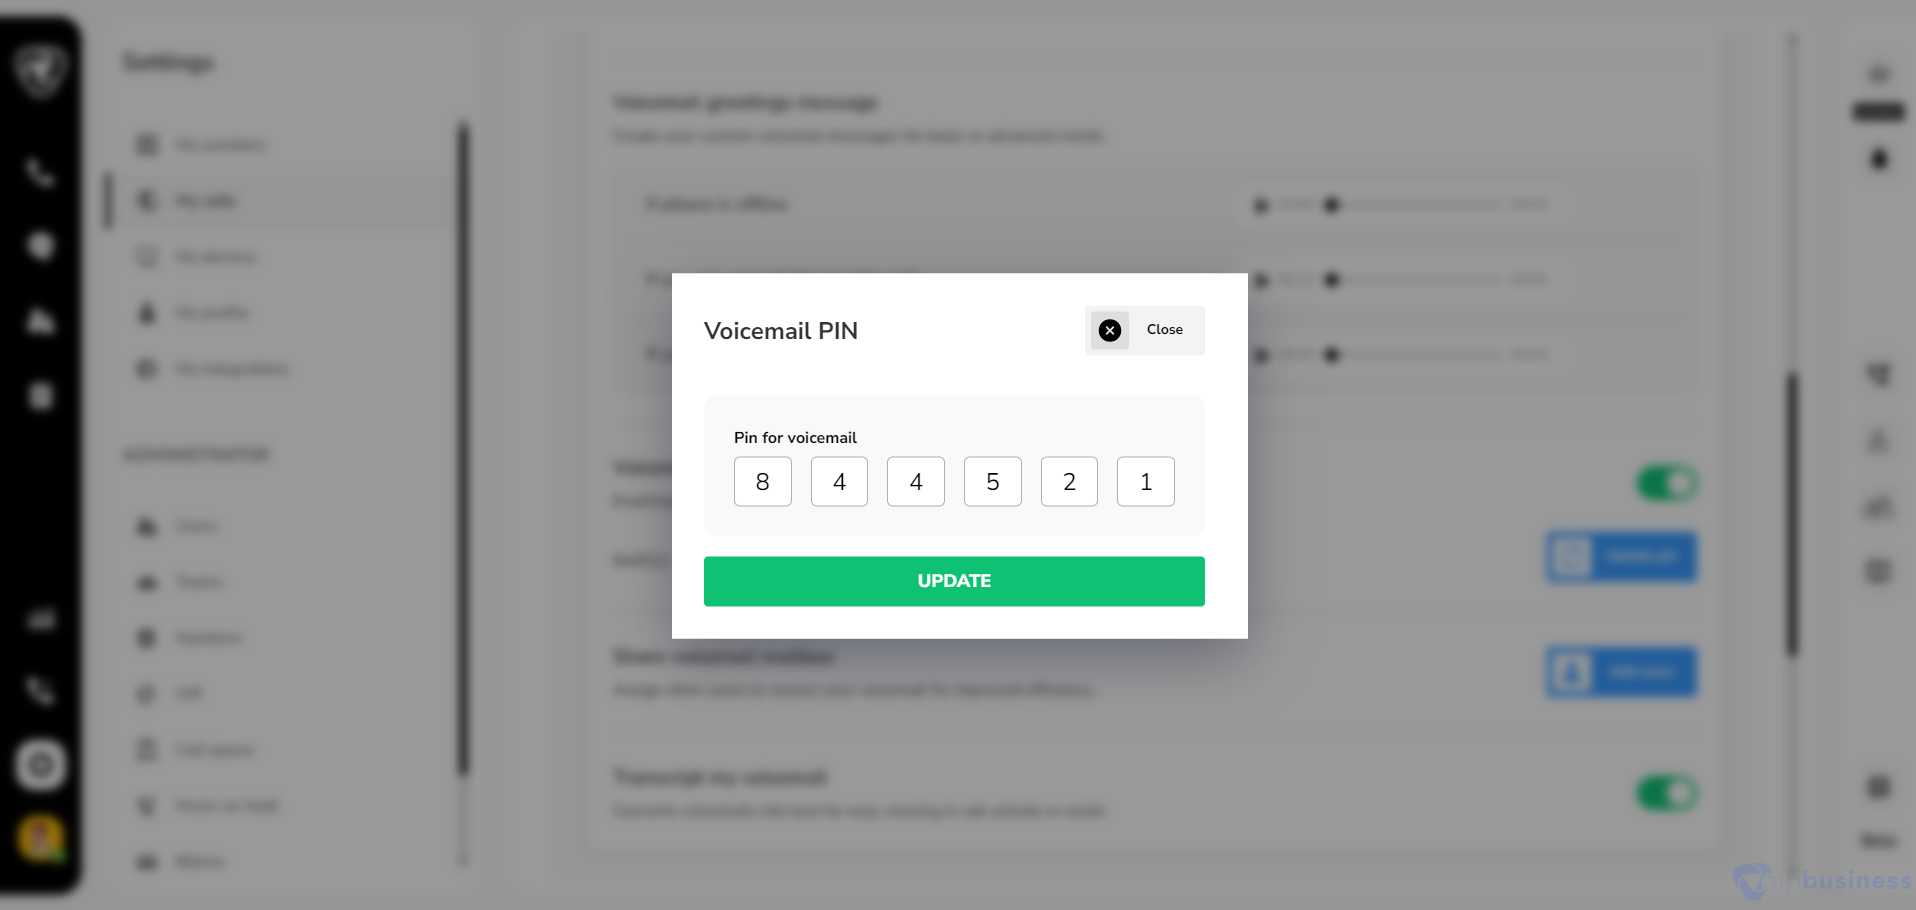
4. Voicemail Pin Enable
With Voicemail PIN secure your messages and ensure only you can access them. Set up or change Voicemail PIN by following the steps below:
Go to “My Settings”.
Scroll down to “User Based Call Routing” and click “show”.
Navigate to “voicemail Settings”.
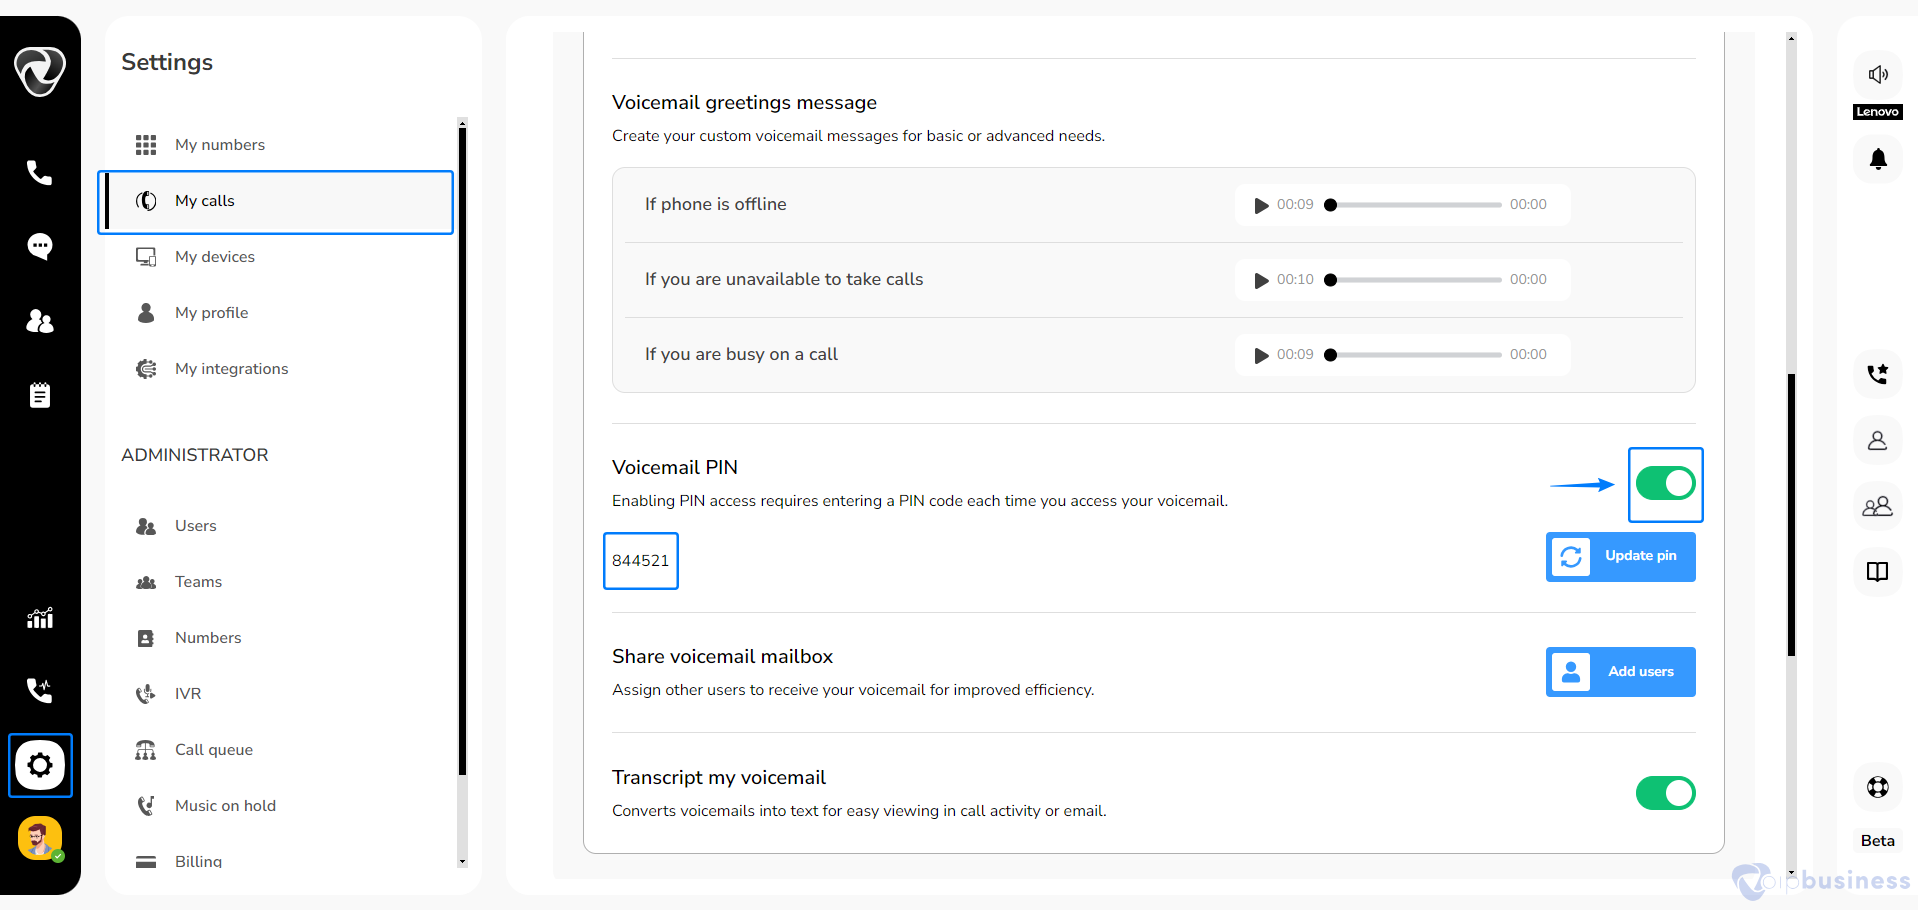
Scroll to ‘Voicemail PIN Enabled’ and set it “on” .
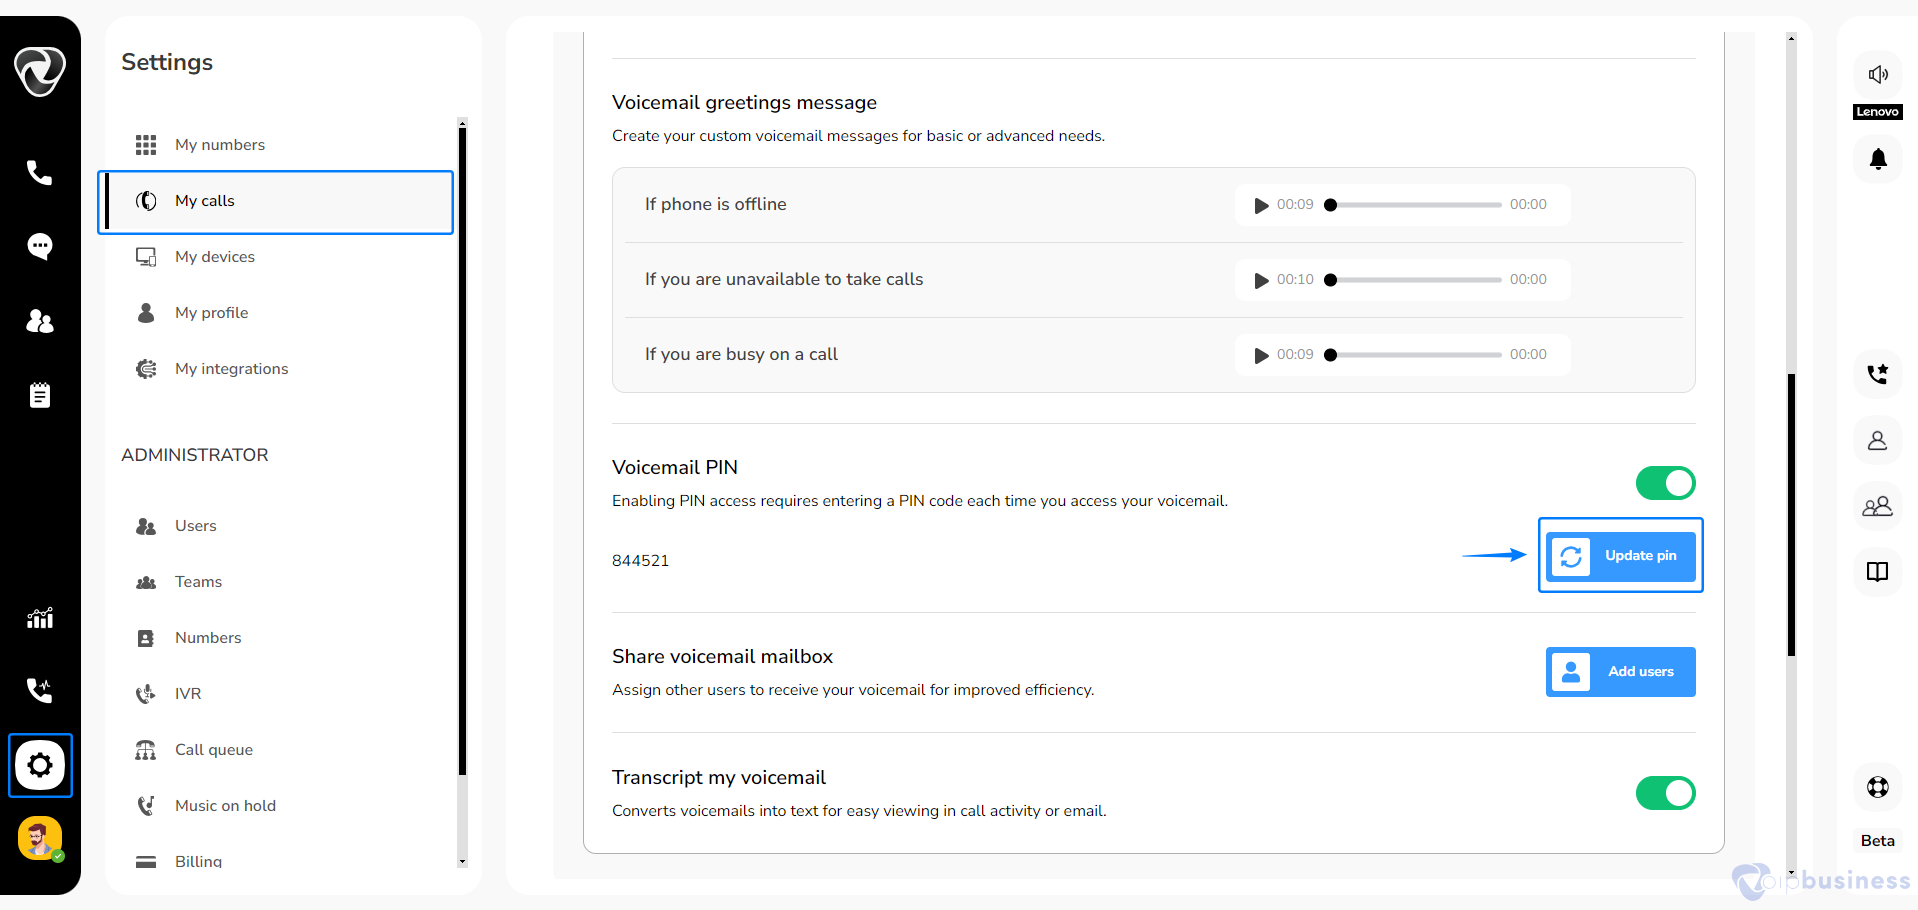
Click ‘Update PIN’ to set or modify your PIN.
Set your voicemail pin and click “Update”
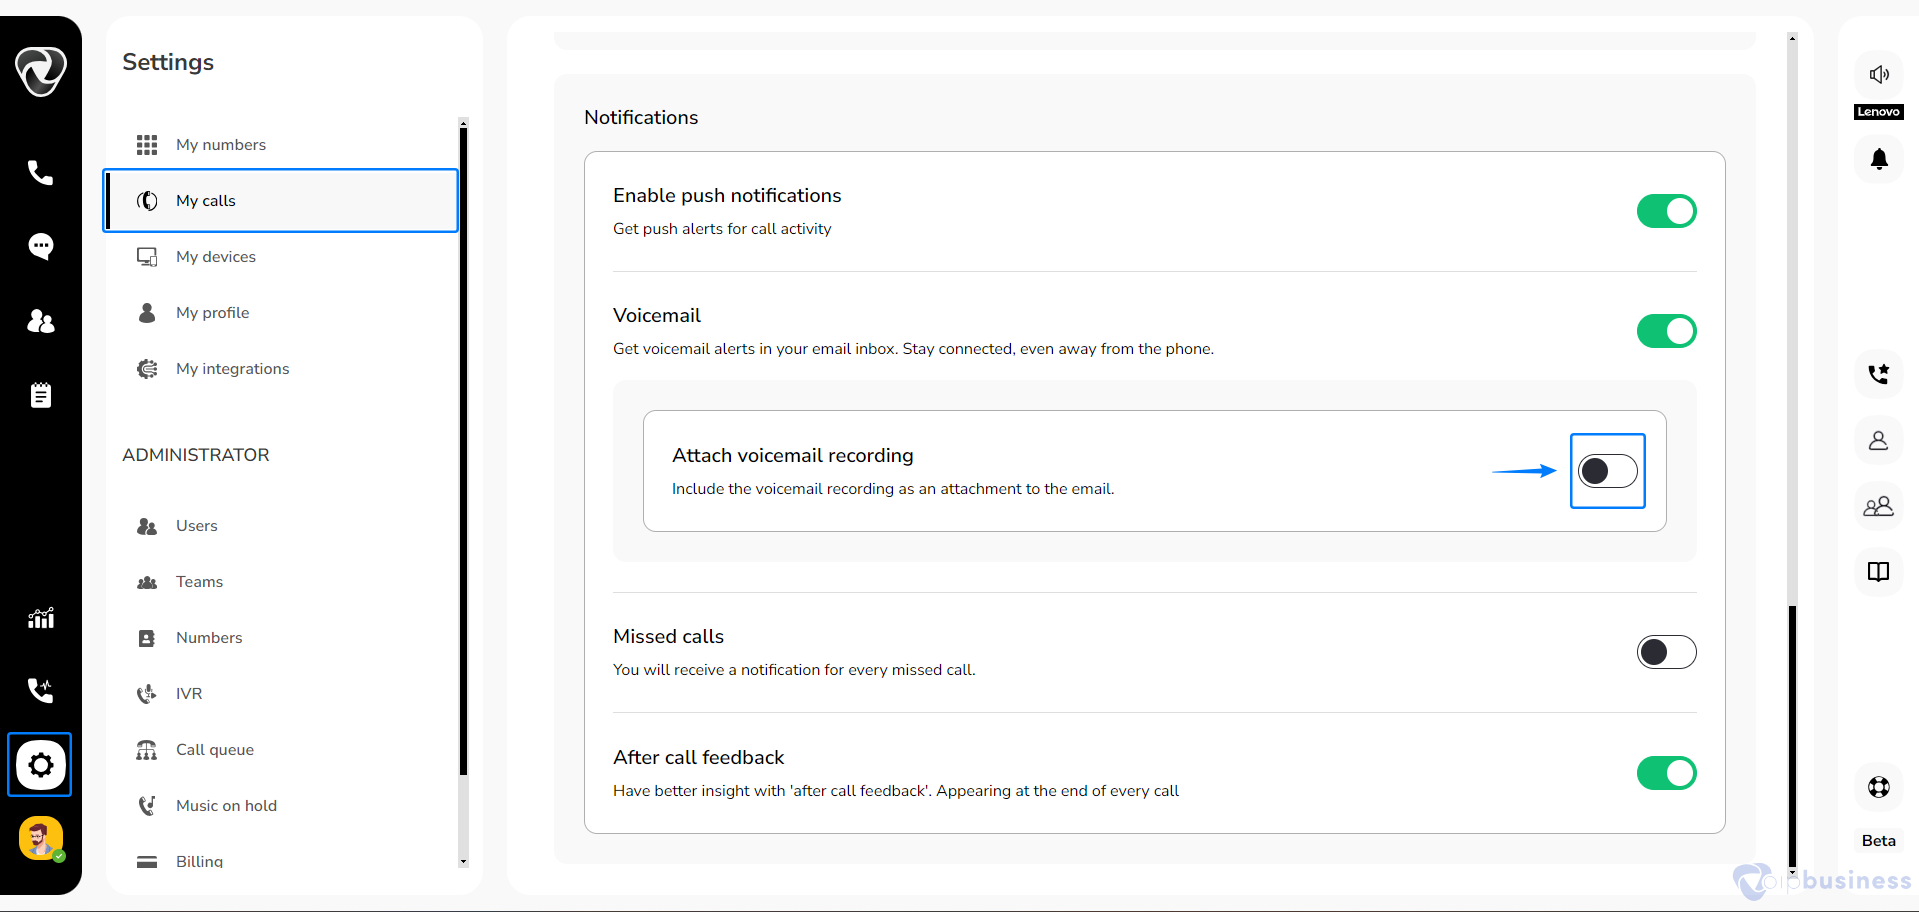
5. Send Voicemail alerts to email
Activate voicemail alerts to email by with the simple steps below:
Go to “My Settings”.
Scroll to “Notifications” and set“Voicemail Notifications” to “on”.
Set “Attach voicemail recordings” to “on” to receive audio files in email.
Then you will see following option:
Attach voicemail recordings
Activate this option to receive voicemail recordings directly in your email inbox.
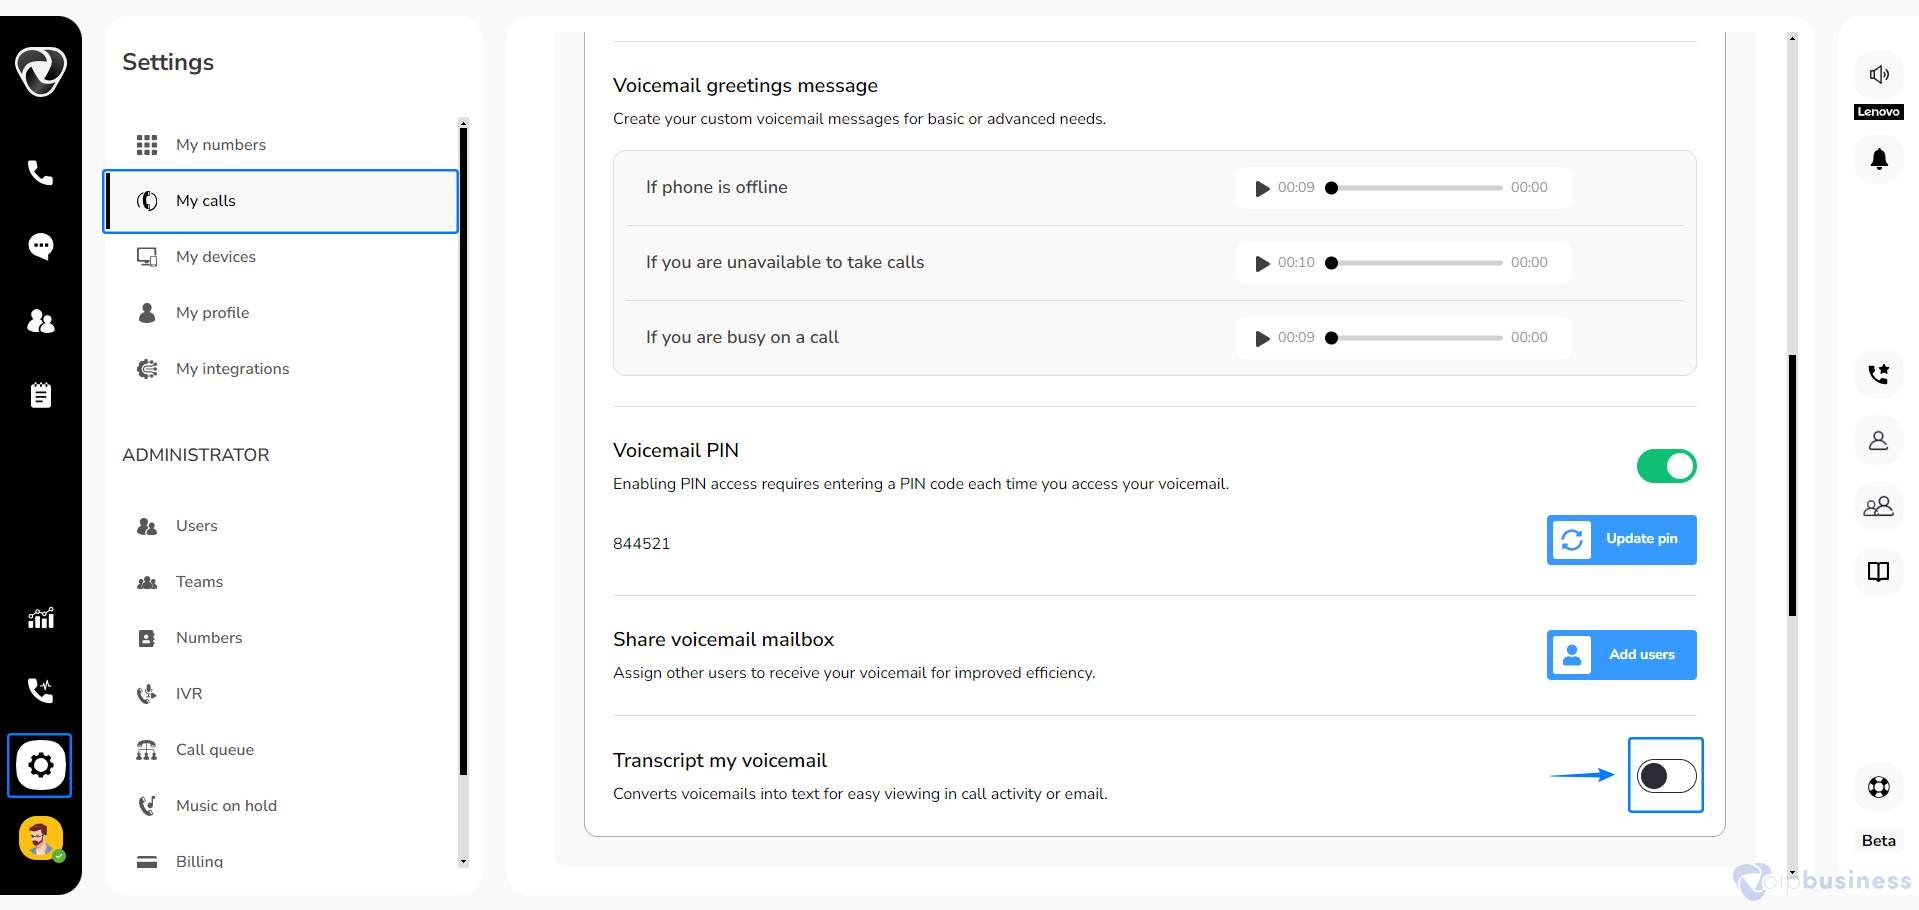
How to enable “Voicemail transcript via email”?
Transcript voicemail converts voicemail messages into text, making it easier to read and review messages quickly.
Go to “My Settings”.
Scroll down to “User Based Call Routing” and click “show”.
Navigate to “voicemail Settings”.
Scroll down to “Transcript My Voicemail” and set it on.
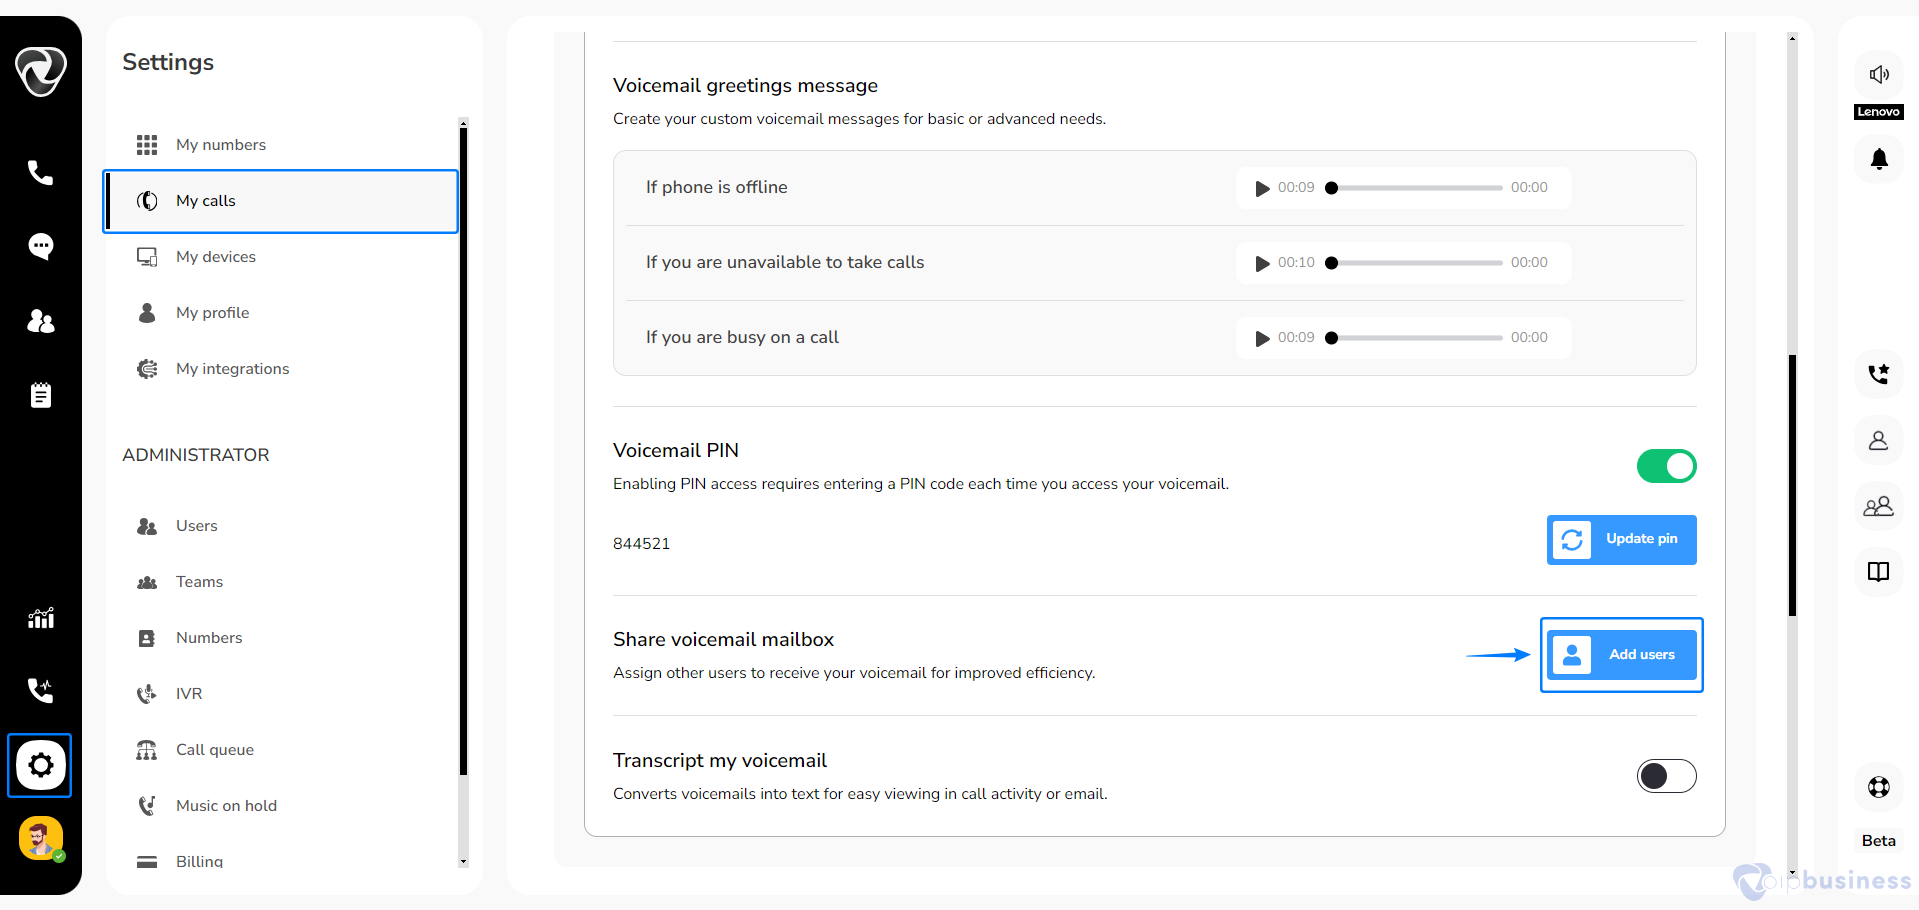
6. Shared Voicemail
Seamlessly share voicemail boxes with other users.
Go to “My Settings”.
Scroll down to “User Based Call Routing” and click “show”.
Navigate to “voicemail Settings”.
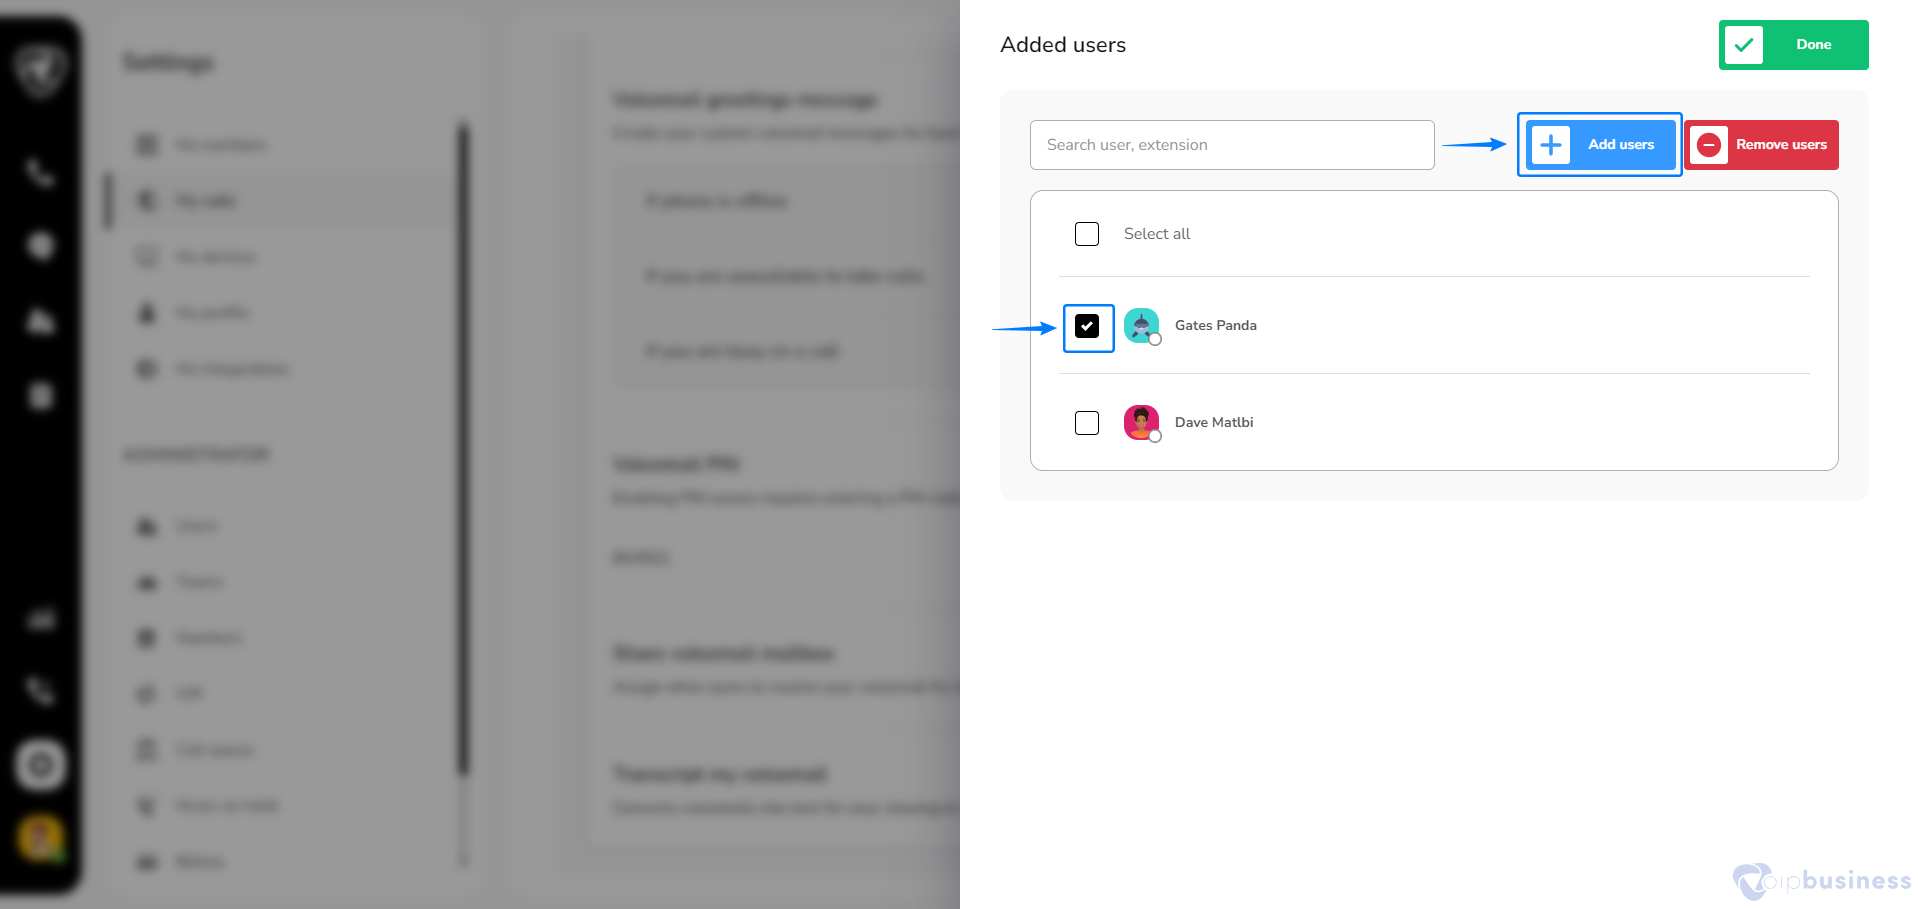
Scroll down to “Share Voicemail Mailbox”, and click “Add Users”
Select “Users” from the given list of users and click “Done”.
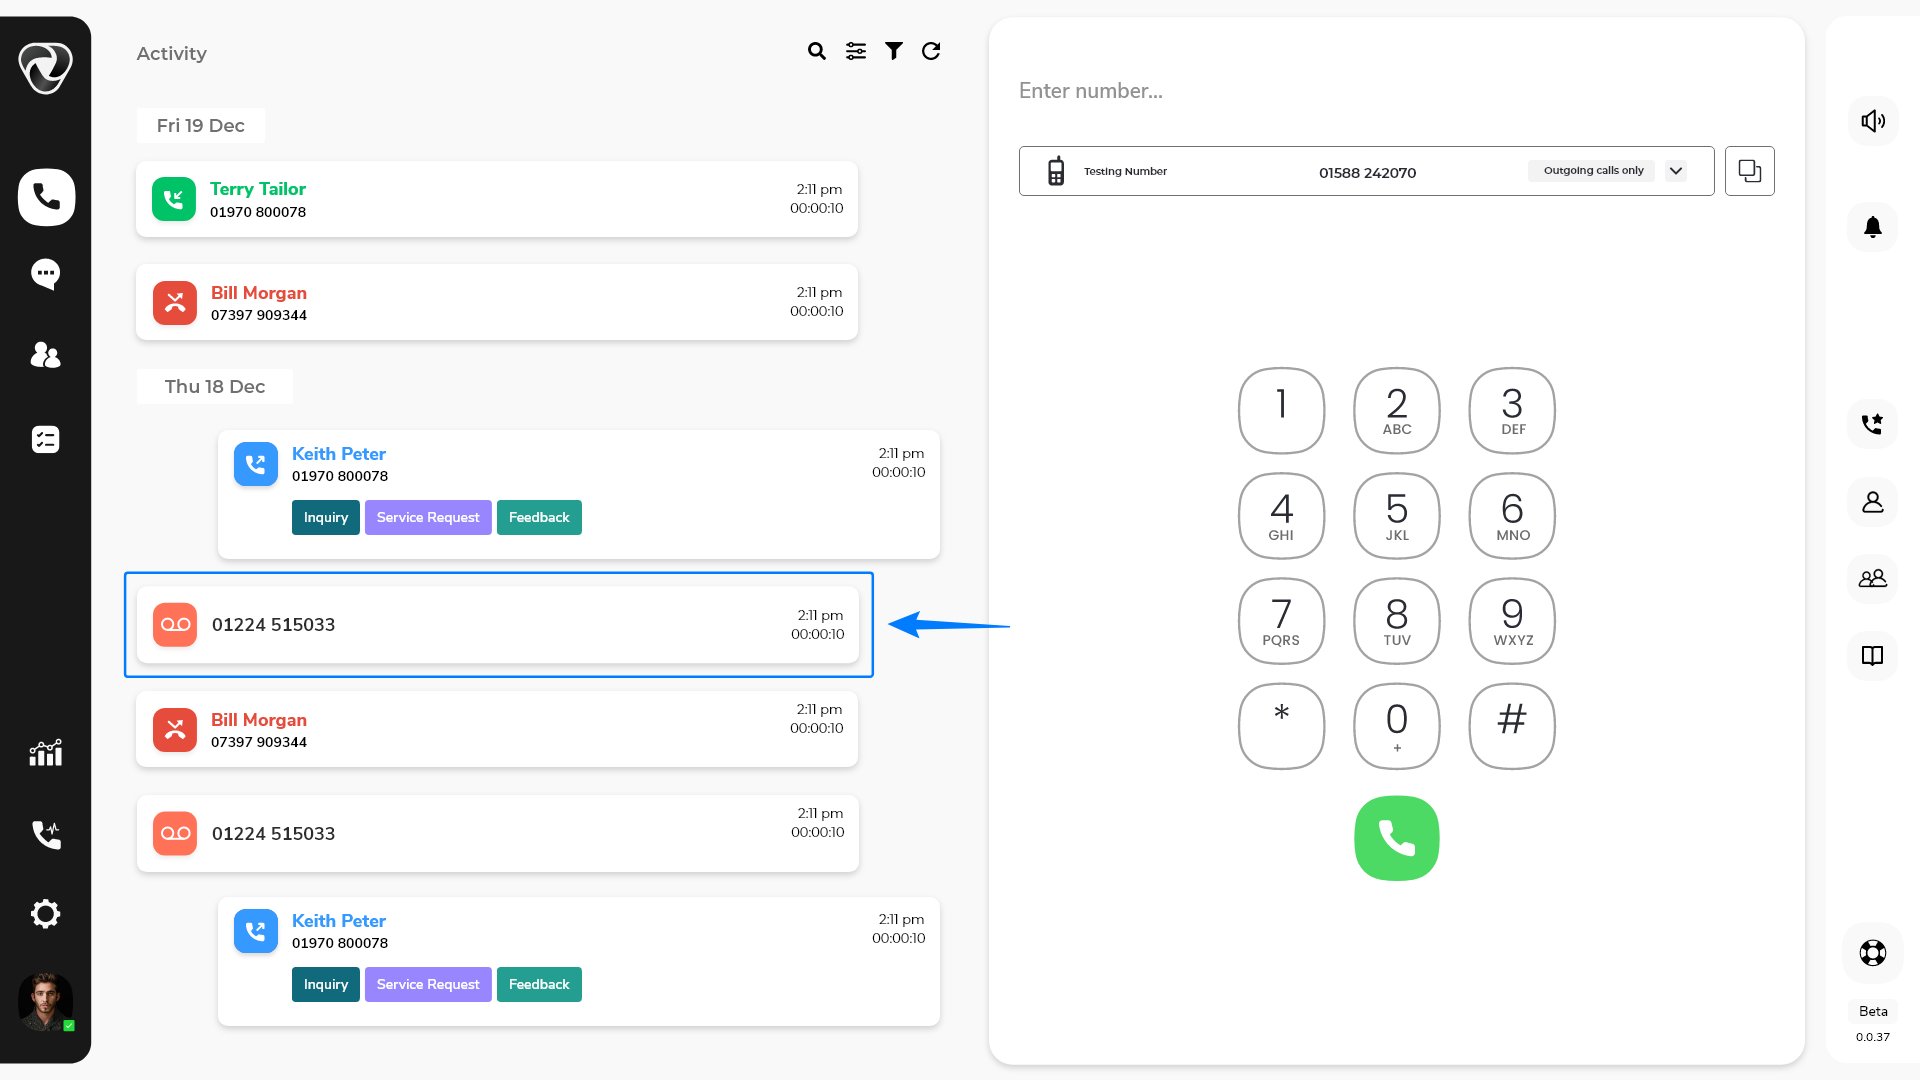
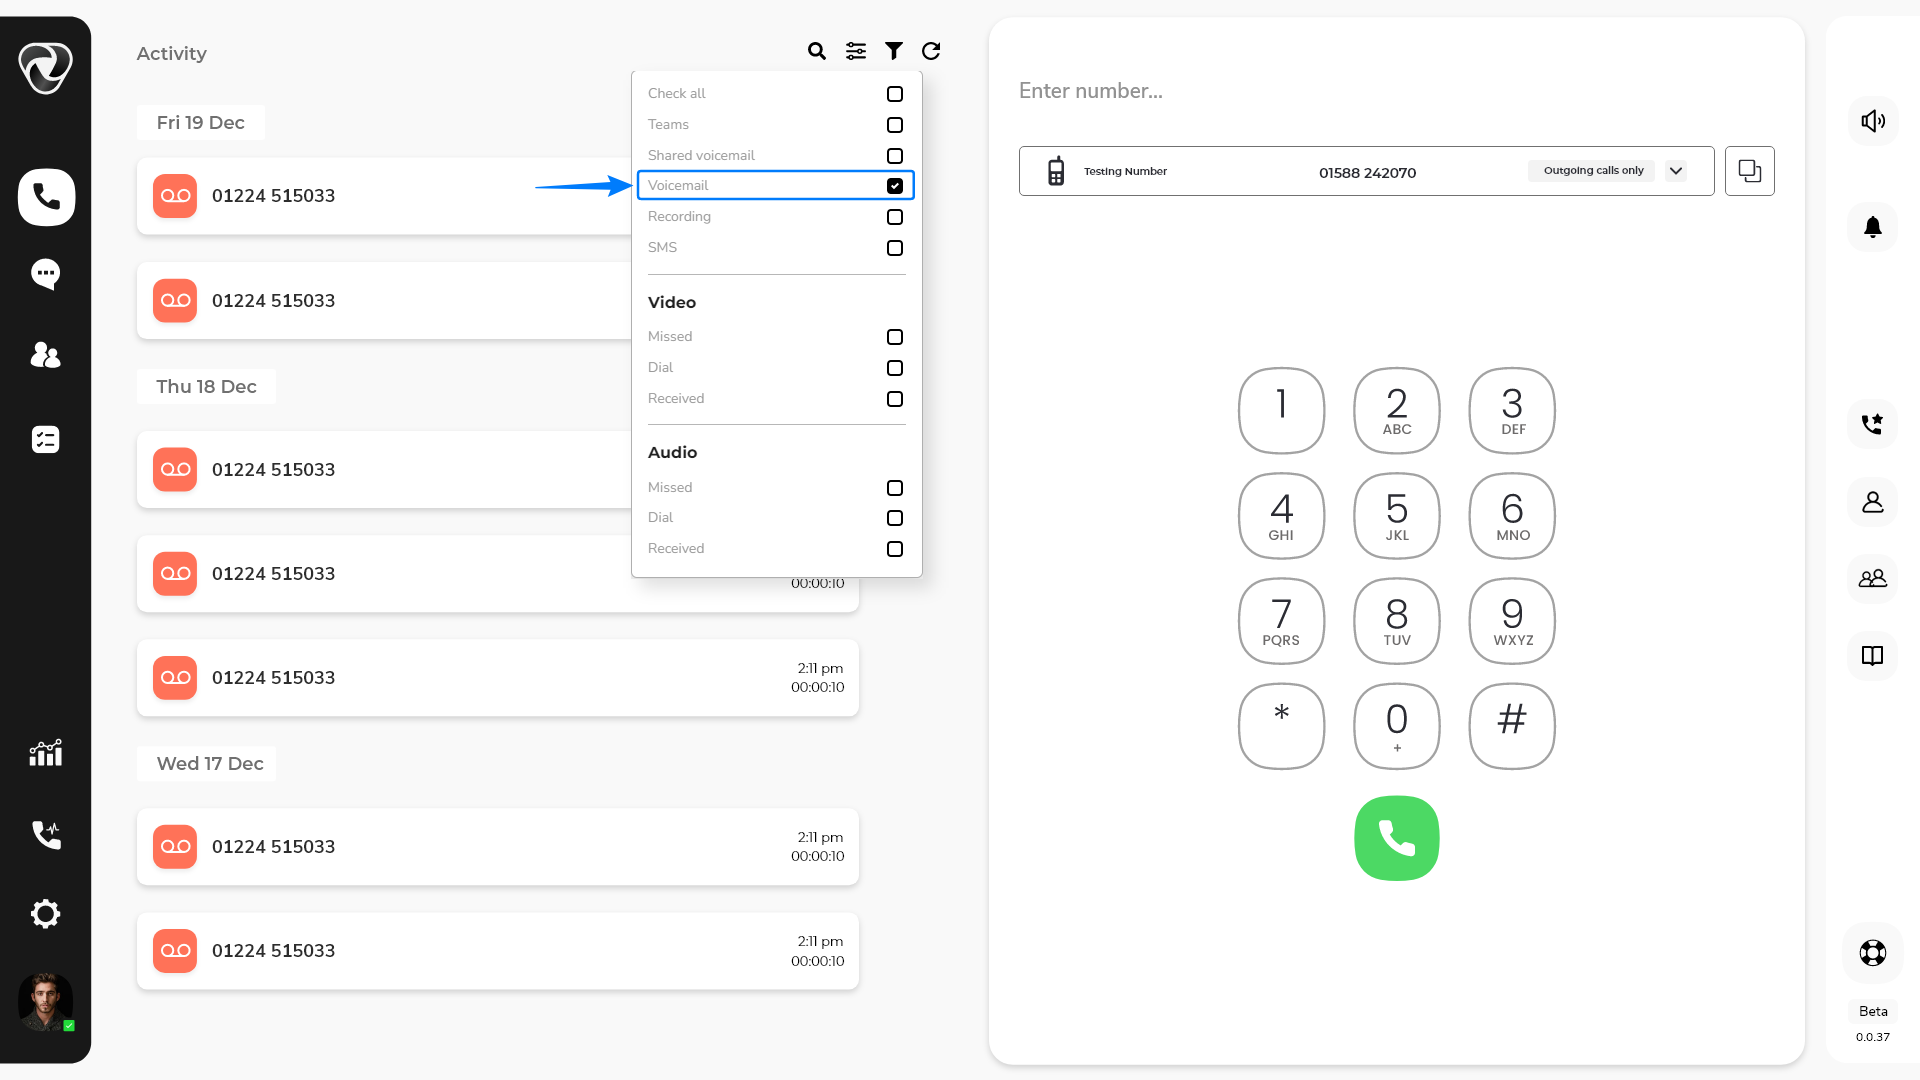
7. Access voicemails seamlessly through the Activity Feed
Our communication portal lets you access voicemails in different ways. Voicemails are listed in your Activity Feed, along with records of all your calls.
In the “Activity Feed” click on “Filter Icon”.
Select “Voicemail” and access them in your activity feed.