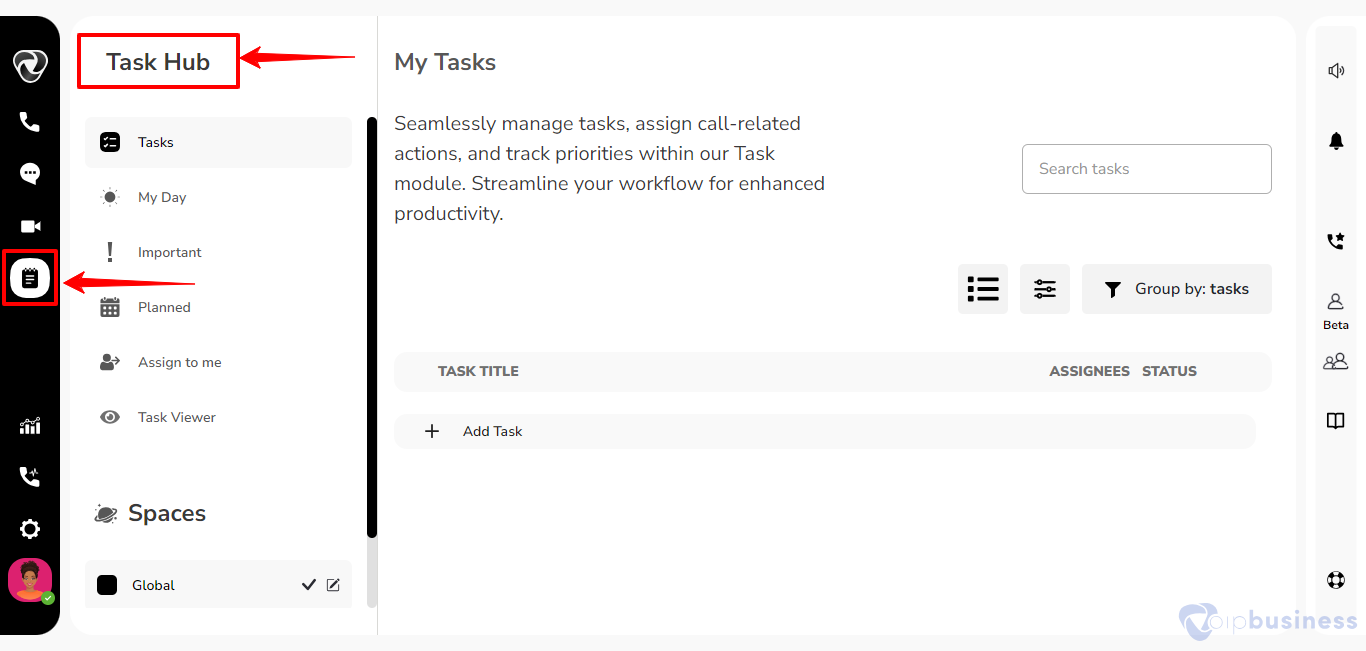
1. How can you access the VoIP business task hub?
To get to the Task Hub in our communication dashboard, follow these easy steps:
- Log in to your account.
- Navigate to the task hub by selecting the dedicated icon situated on the left sidebar.
- A new interface will appear, providing you with comprehensive access to explore and use “Task Hub” module.
2. How can one create “space” within the Task Hub?
- Access the Task Hub through the dedicated icon in the left sidebar.
- Scroll down the sidebar within the Task Hub and select the ‘new space’ button.
- A new screen will pop up in the middle of your screen.
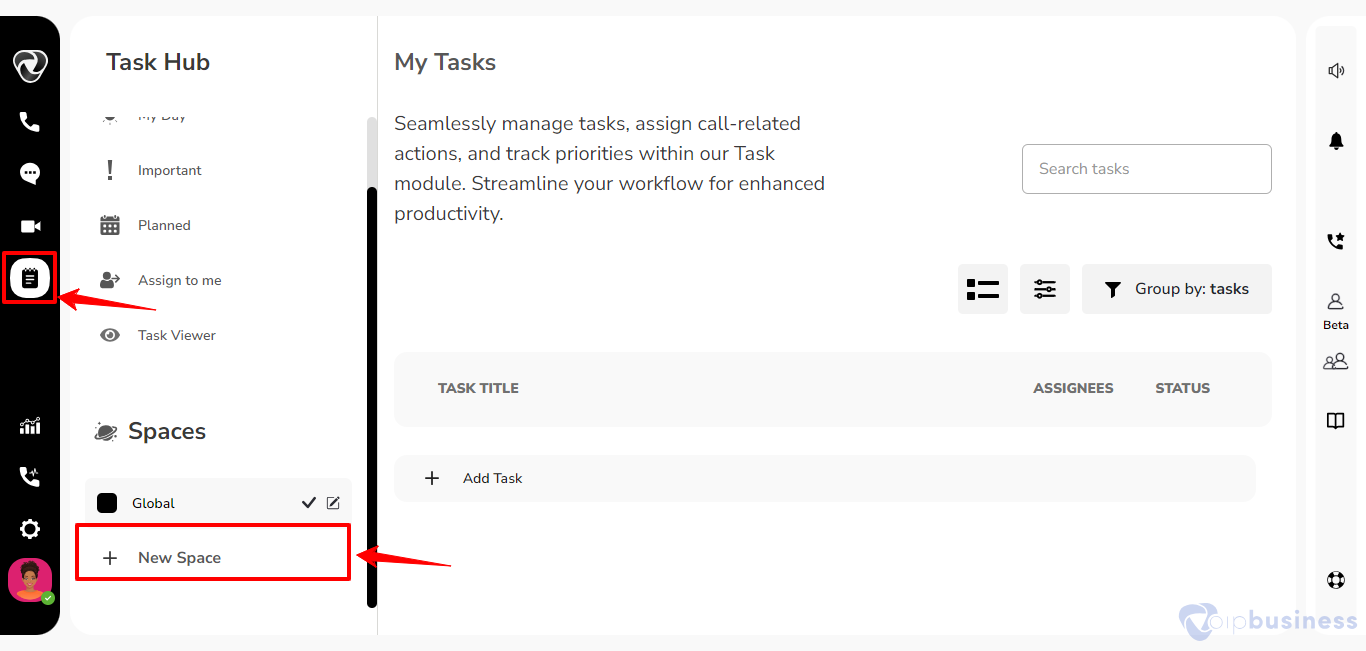
- Type in the space name and choose the colour for your space. .
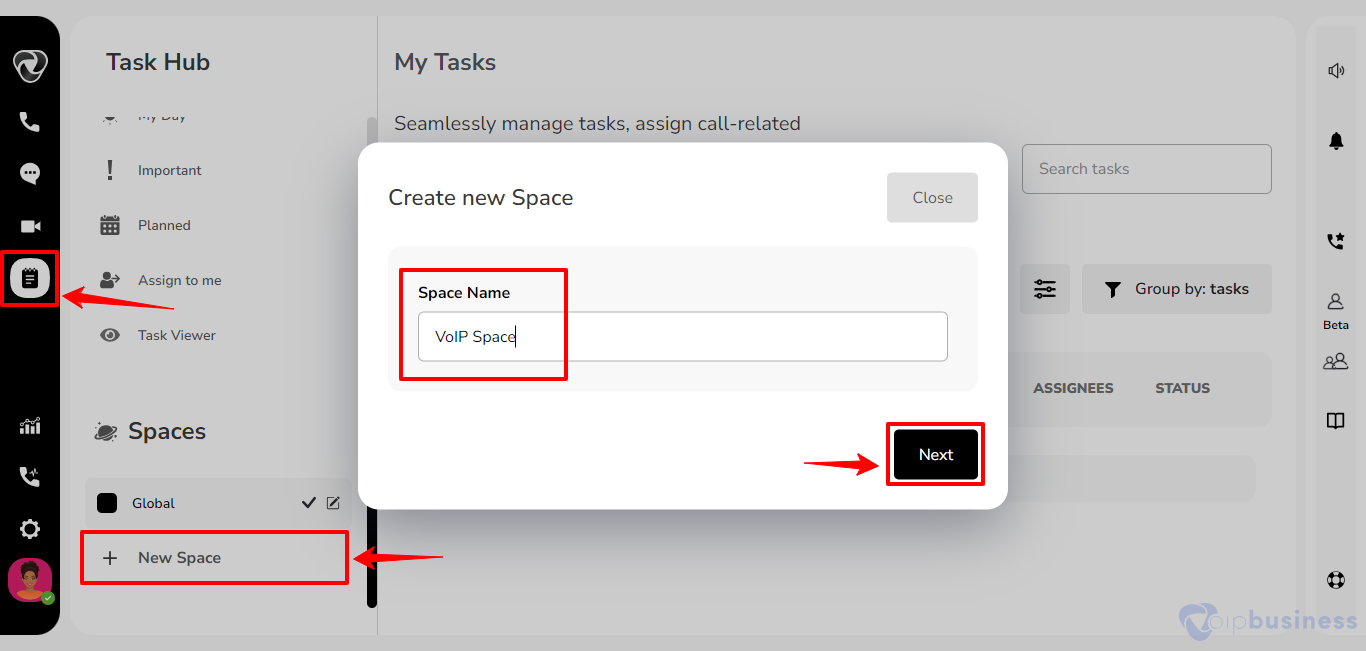
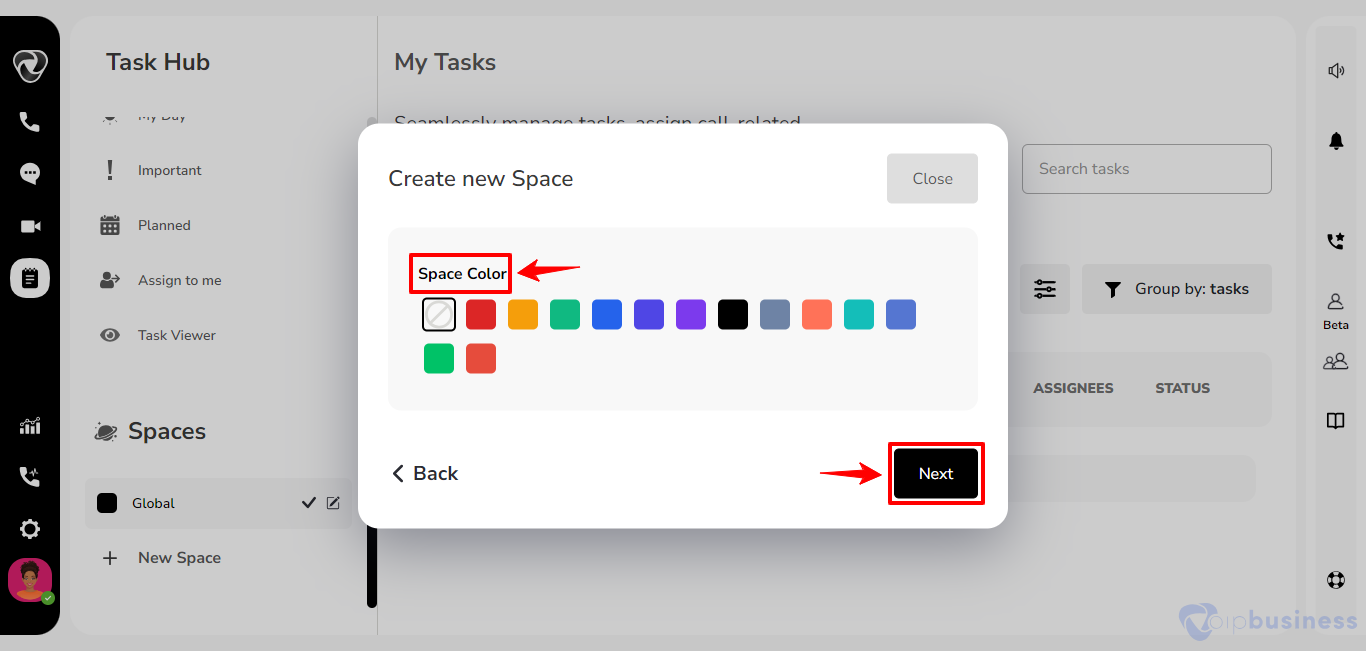
- Decide if the space should be private or part of the VoIP workspace.
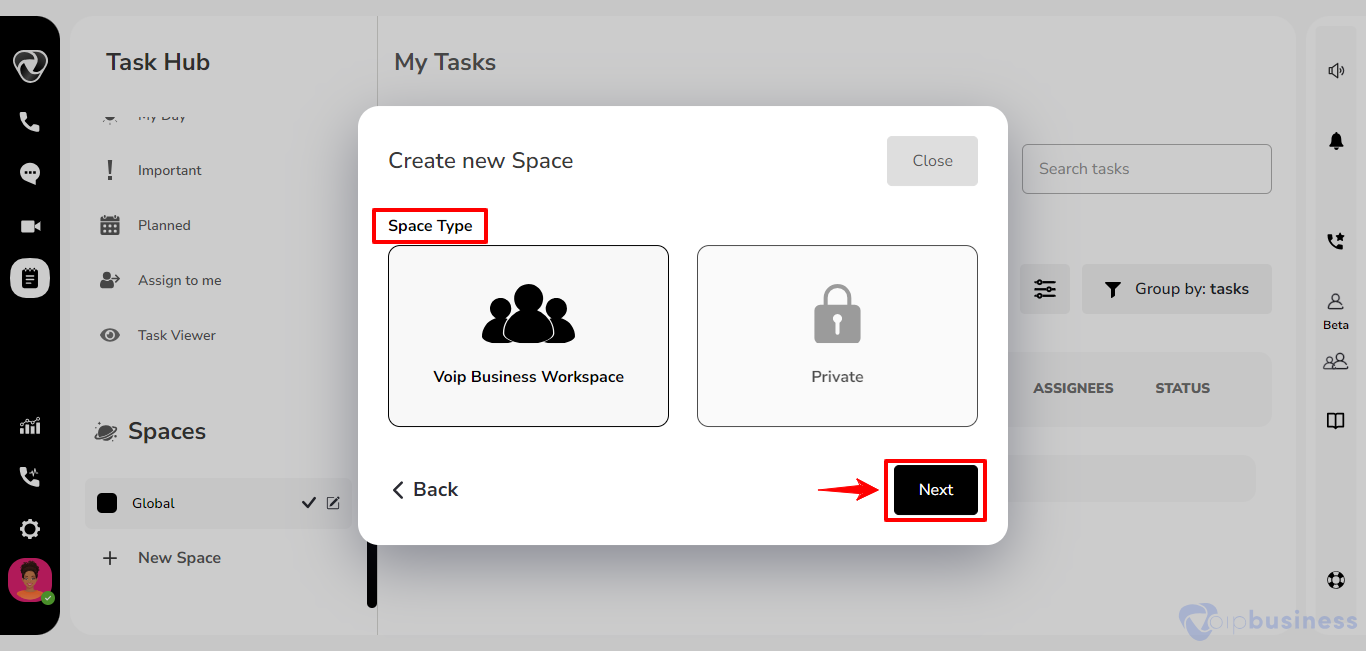
- Finally, click the ‘Create Space’ button.
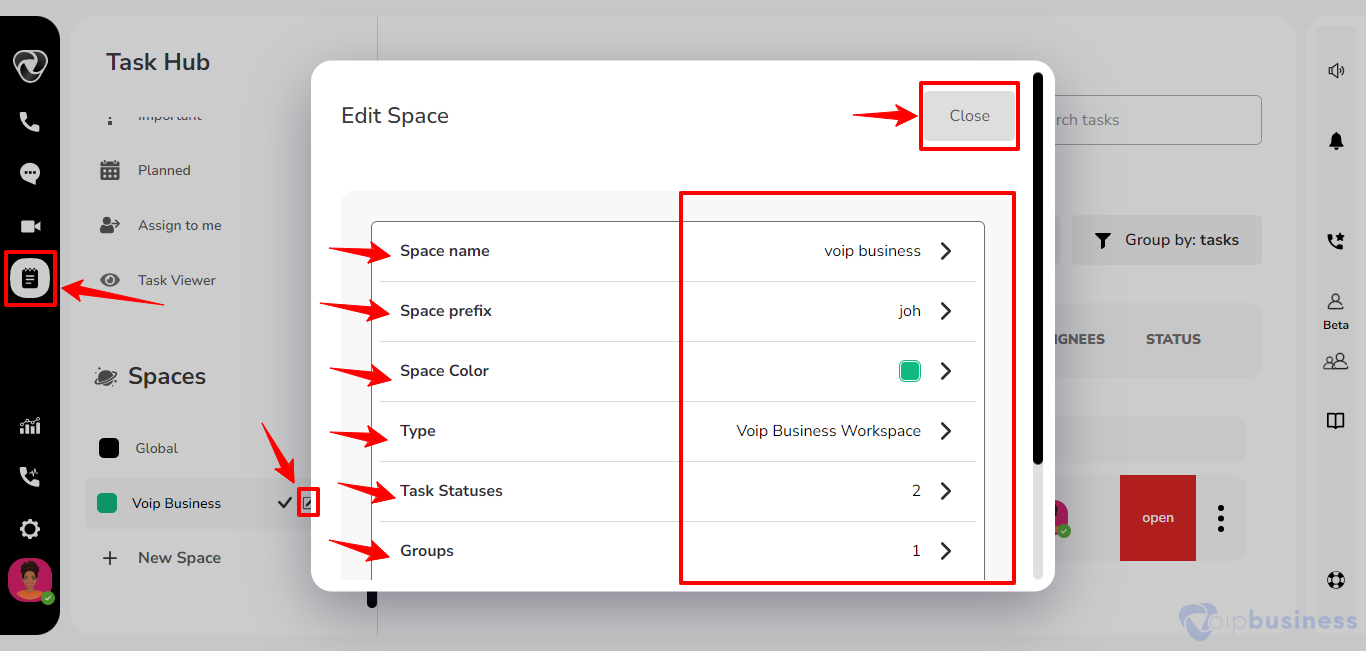
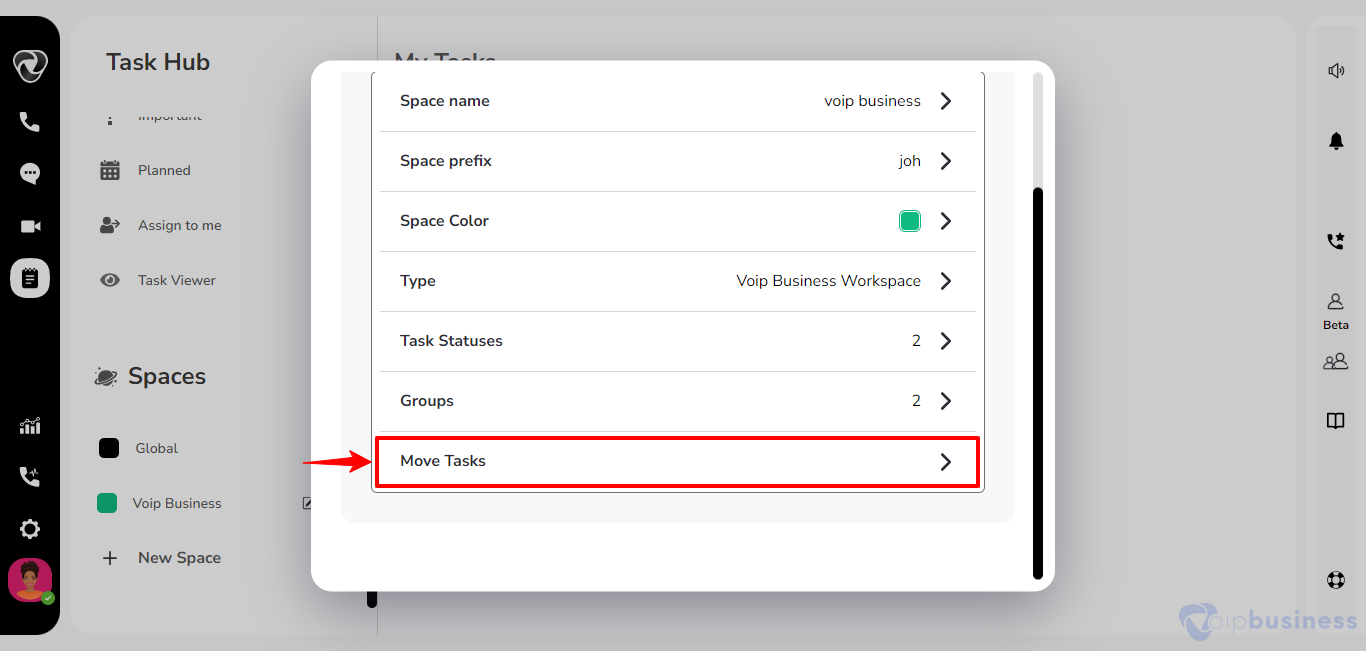
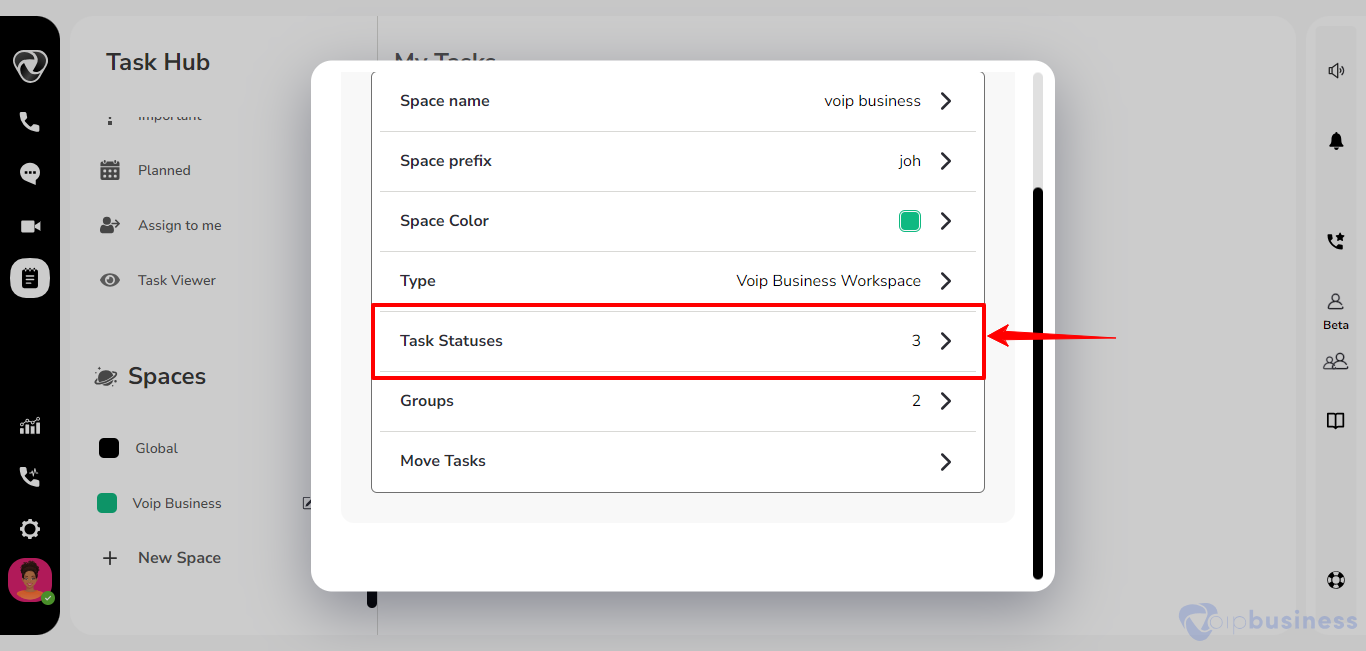
3. How can one edit existing spaces within the Task Hub?
- Initiate the process by selecting the Task Hub icon situated in the left sidebar.
- Scroll down, hover on the space name you want to edit and click the ‘Edit’ button.
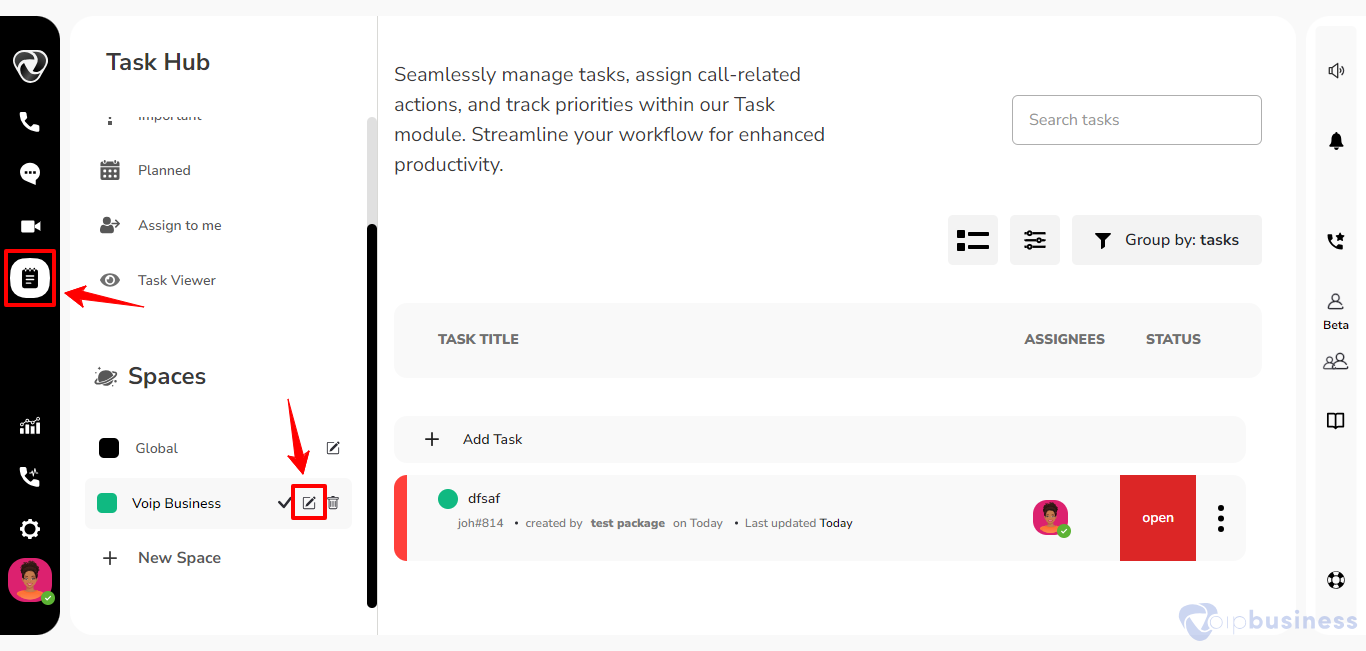
- A new screen will open, allowing you to change the space name, prefix, colour, type, task statuses, groups, and move tasks.
Here you are able to Edit:
- Space name
- Space prefix
- Space color
- Type
- Task Statuses
- Groups
- Move Task
Groups in Spaces
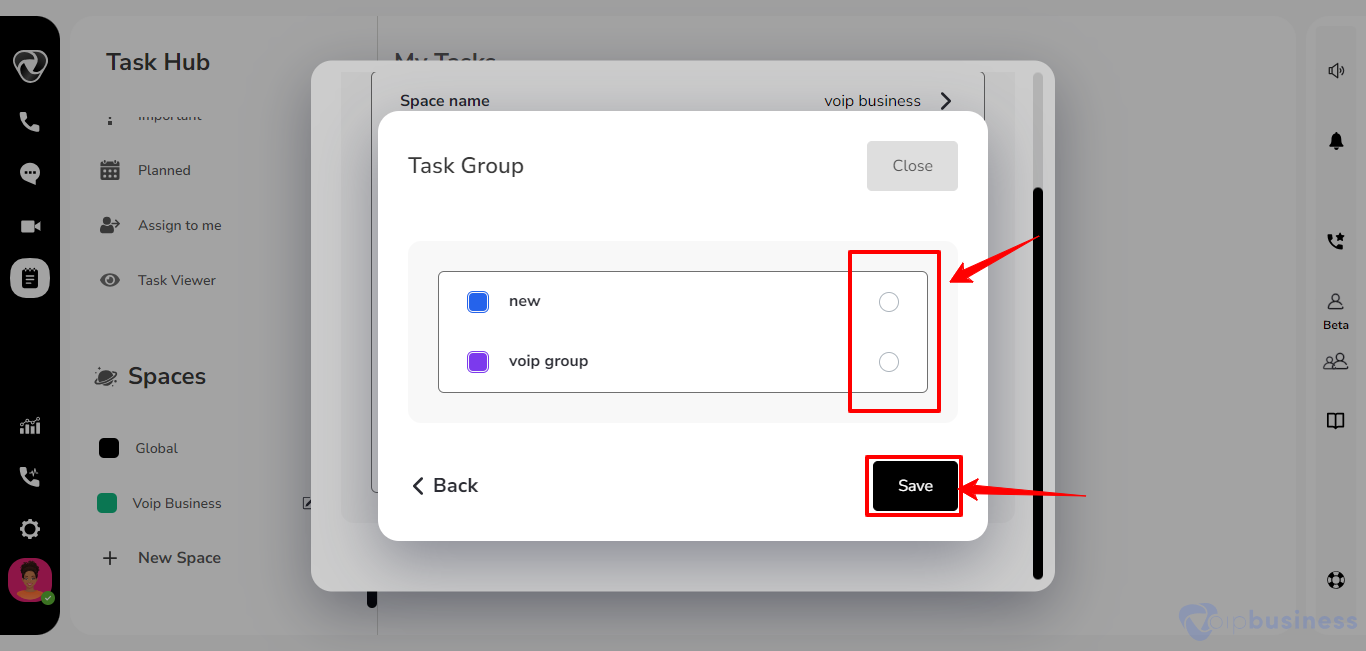
1. How does one create a group within a space in Task Hub?
To create a group within a space in our communication dashboard, follow the steps below:
- Log in to your account and access the Task Hub by clicking on the dedicated icon in the left sidebar.
- Scroll down to the ‘Spaces’ section to find your desired space.
- Hover on space name and click on the ‘Edit’ button for the chosen space.
- Within the editing interface, navigate to the ‘Groups’ section and click on the ‘Add Group’ button.
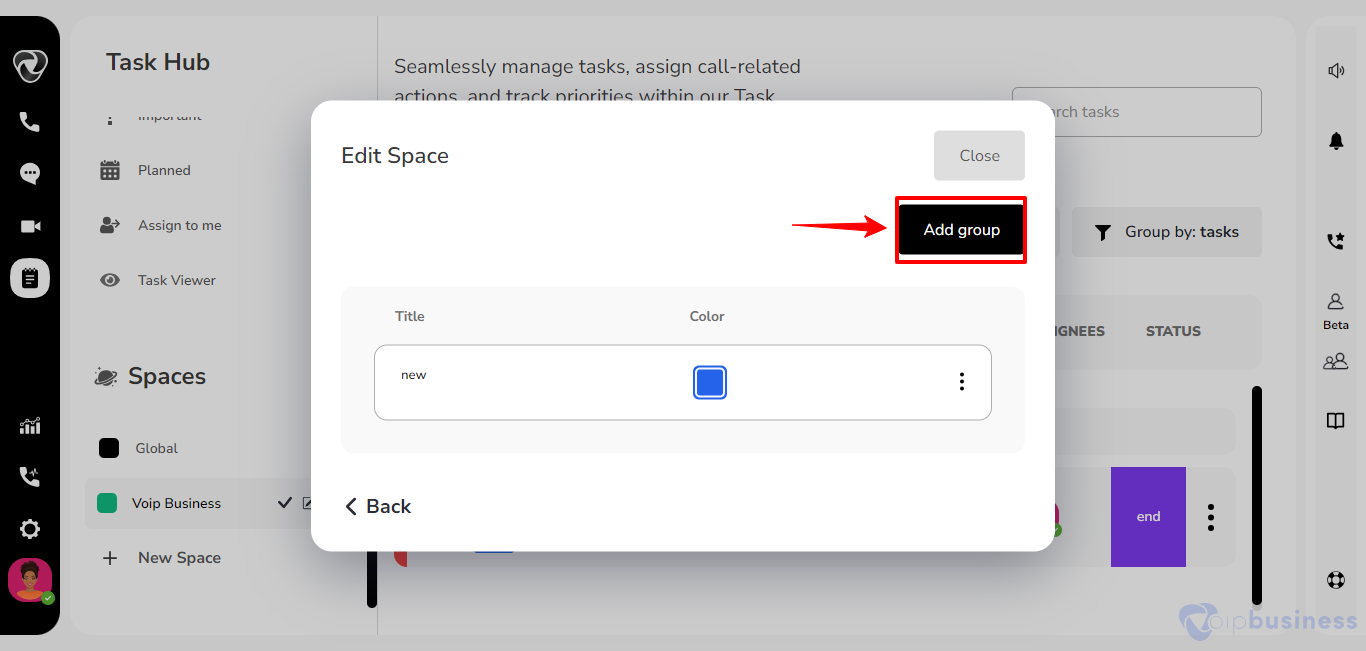
- Enter the desired group name and choose a color for this group.
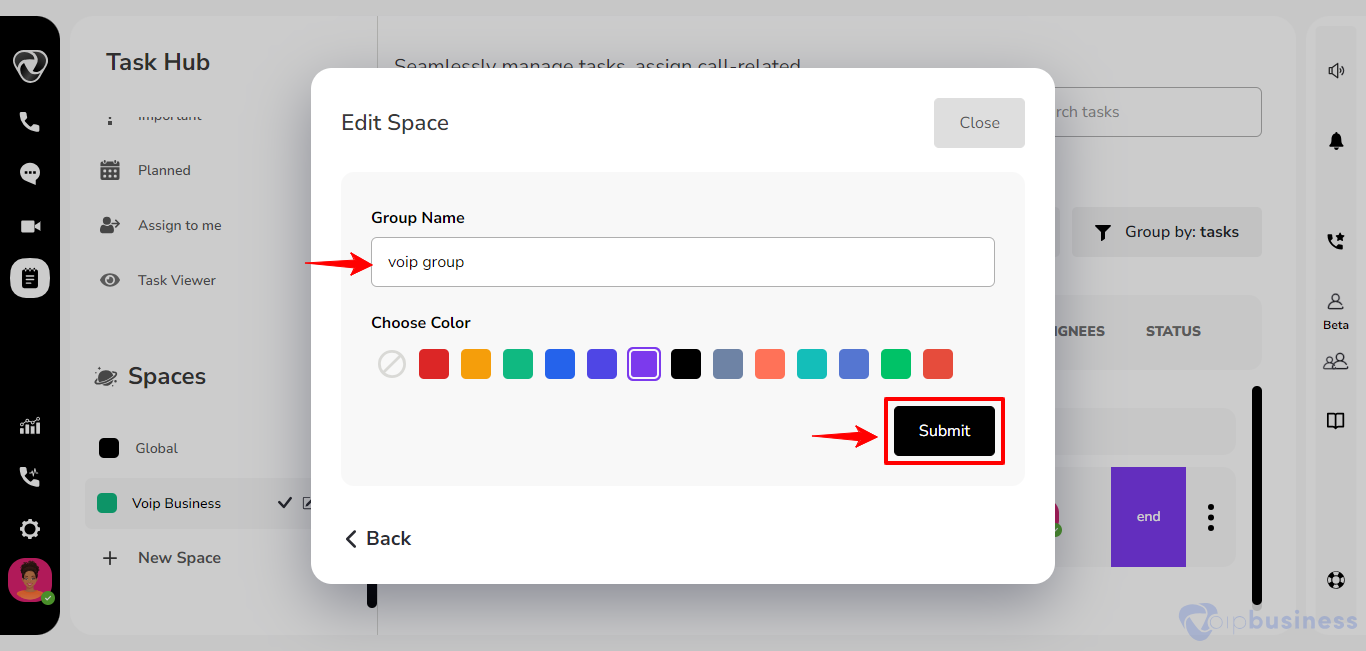
- Complete the process by clicking the ‘Add’ button.
By following these steps, you will successfully create a group within the specified space, enhancing organisational structure and collaboration.
2. How can one relocate all tasks from one group to another within the Space or one space to another?
Here’s a more professional and informative version:
- Navigate to the Task Hub icon located in the left sidebar of the interface.
- Scroll down to the Spaces section and select the Edit icon to modify task details.
- Opt for the “Move Task” option.
- Designate the desired space where your target group is located.
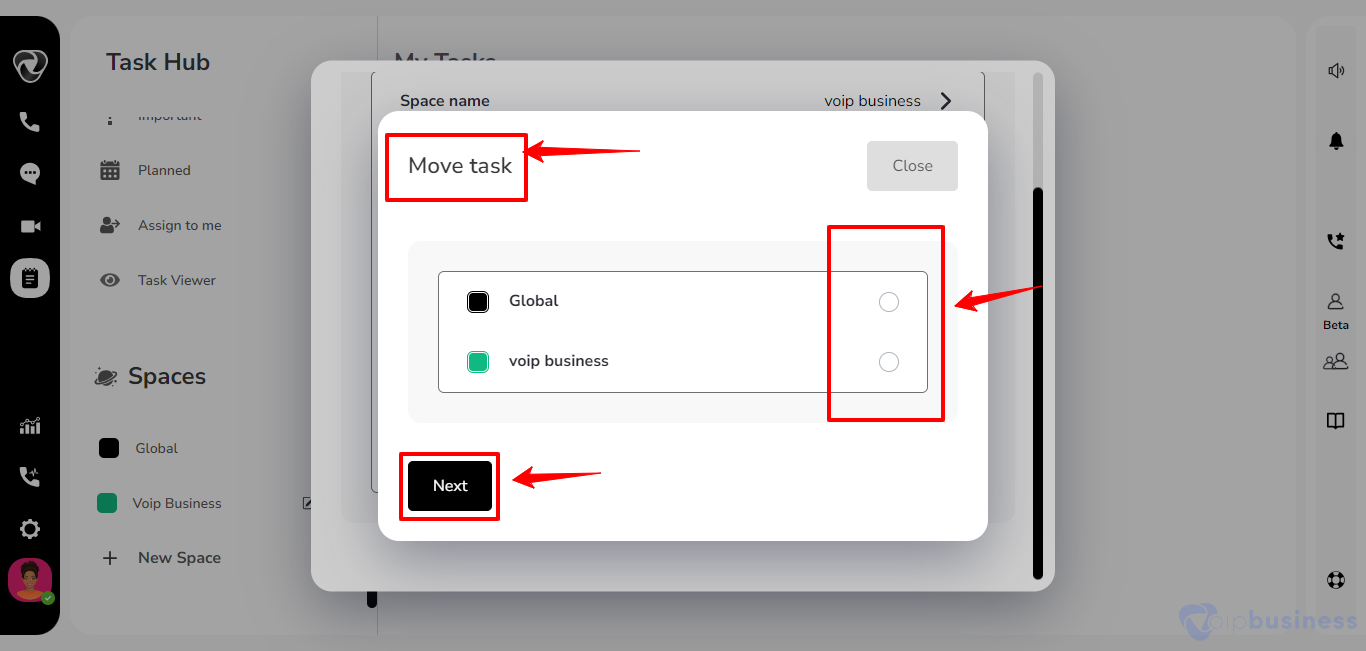
- Subsequently, define the task status according to your preference.
- Use the new interface to specify the group for the task and conclude by clicking the Save button to confirm the changes.
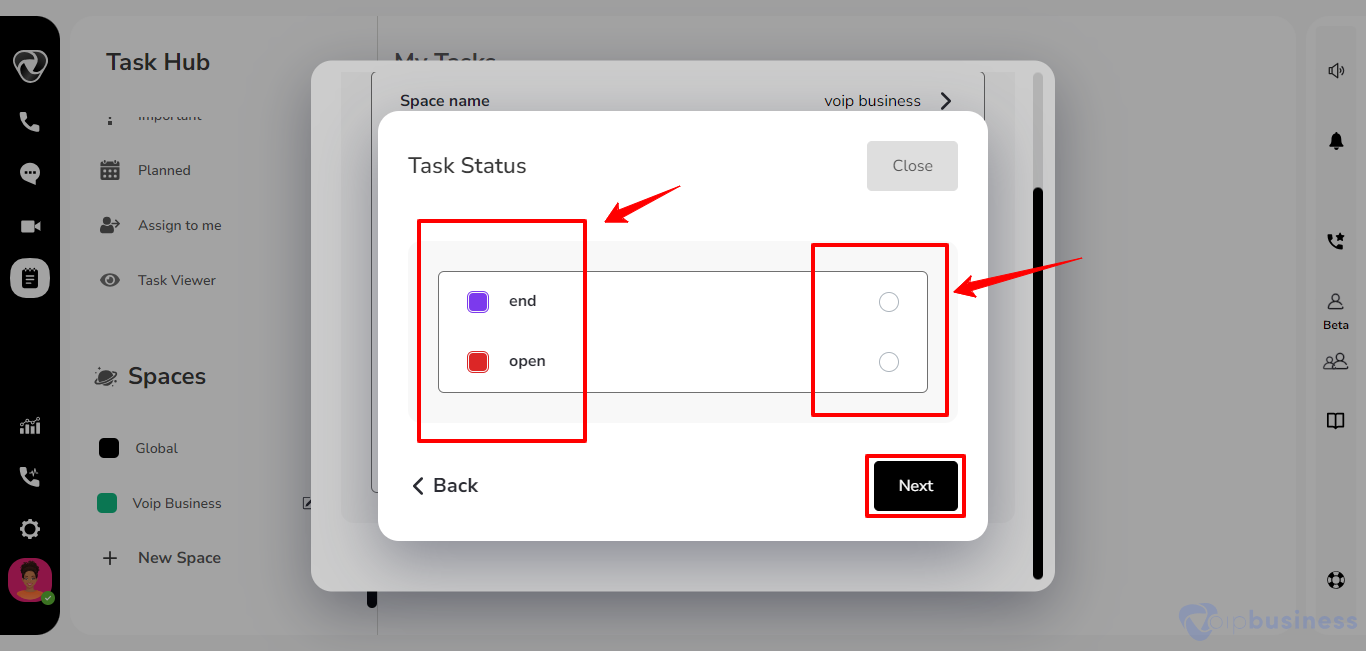
3. How can additional task statuses be added within a space?
Statuses help in tracking and managing the progress of tasks through different stages of completion, providing a clear overview of where each task stands in the workflow.
To customise task statuses in line with your preferences follow these steps:
- Access the Task Hub icon in the left sidebar.
- Navigate to the Spaces section by scrolling down the sidebar within Task Hub.
- Select the Edit icon, triggering a new popup on your screen.
- Choose the “Task Statuses” option within the popup.
- Click on “Add Status”.
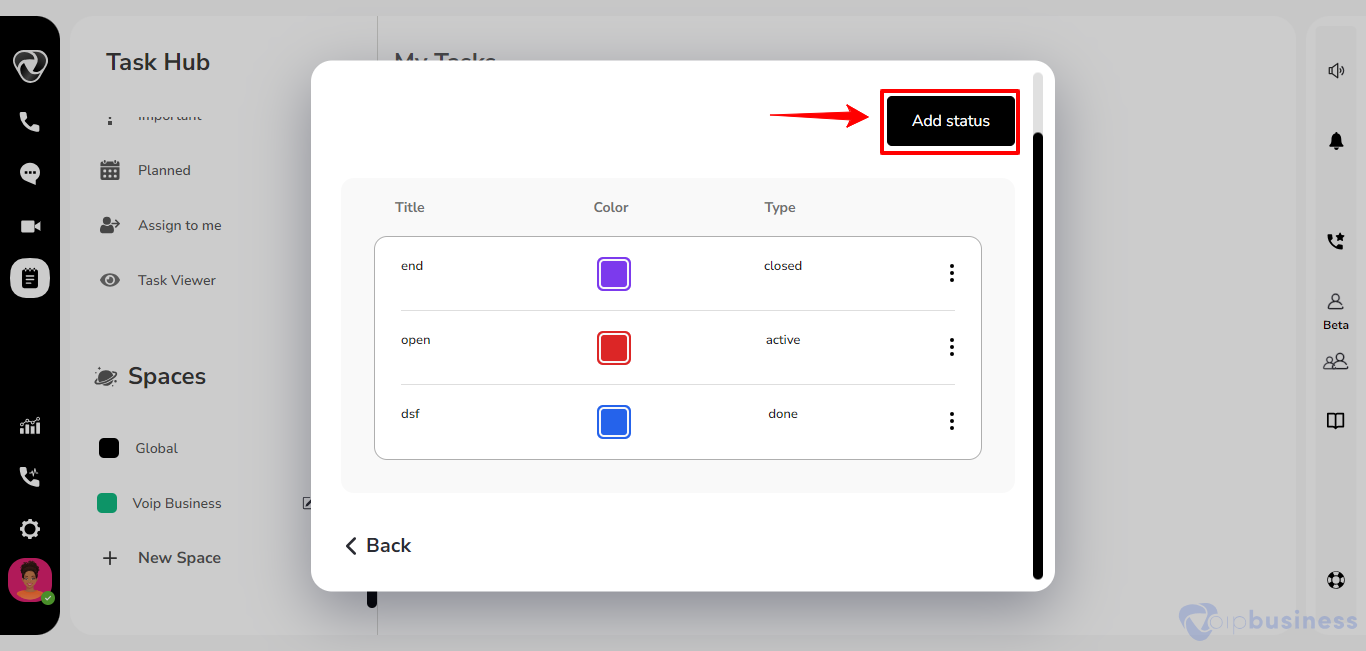
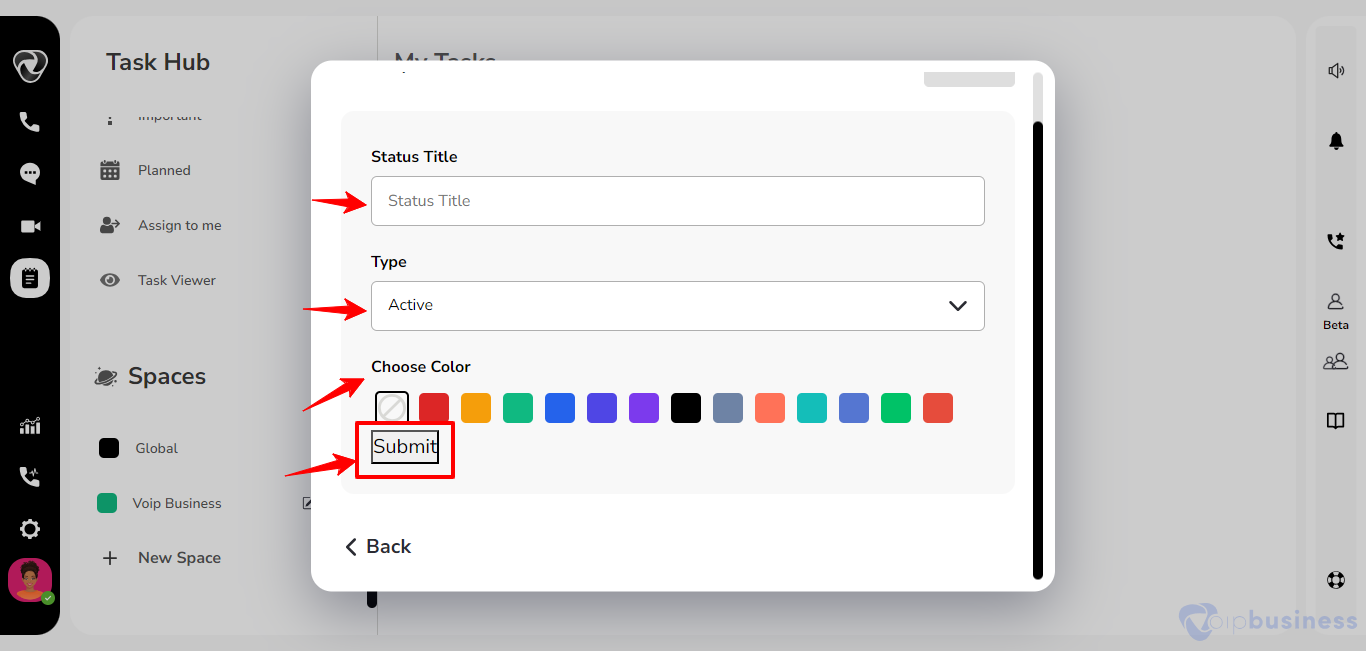
- Input the desired status title, specifying its type and choose color.
- Complete the process by clicking the “Submit” button to integrate tailored task statuses seamlessly into your VoIP business workflow.
Task
1. How can tasks be created in the Task Hub within our communication dashboard?
To add a task, follow these steps:
- Log in to your account, click on the Task Hub icon in the left sidebar.
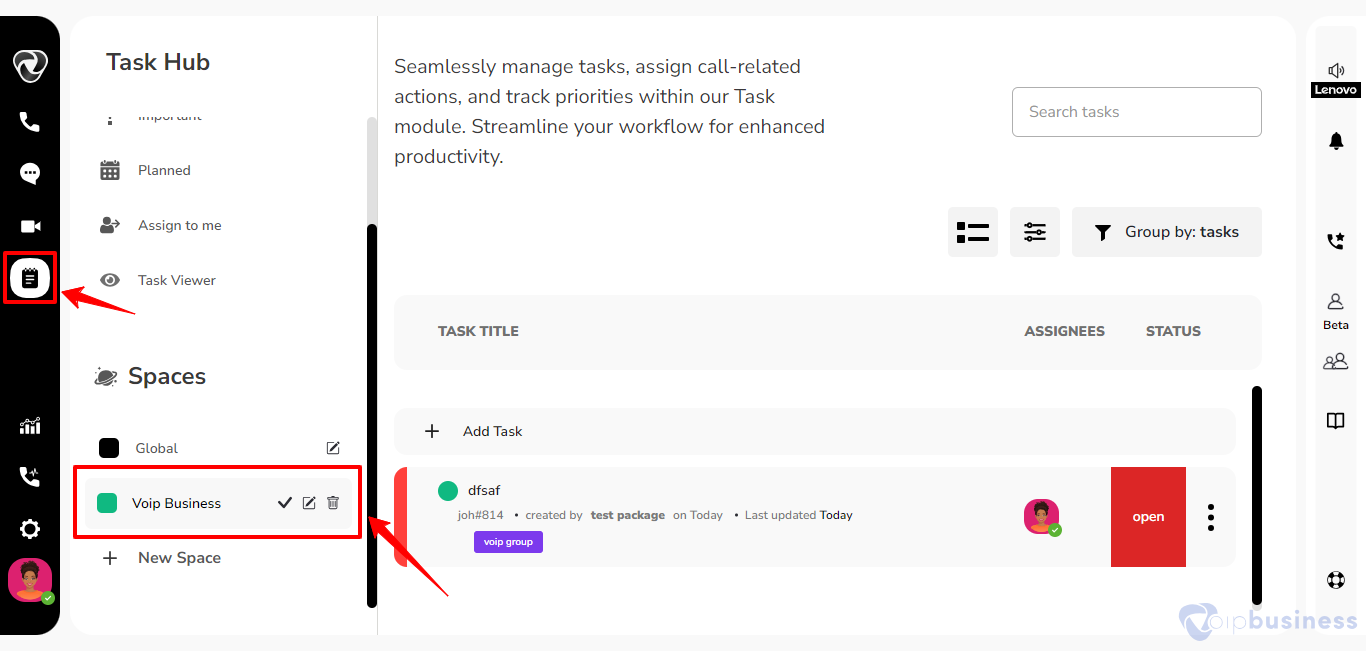
- Select your desired space, and then click on the ‘Task’ option in the left sidebar to view all tasks within that space.
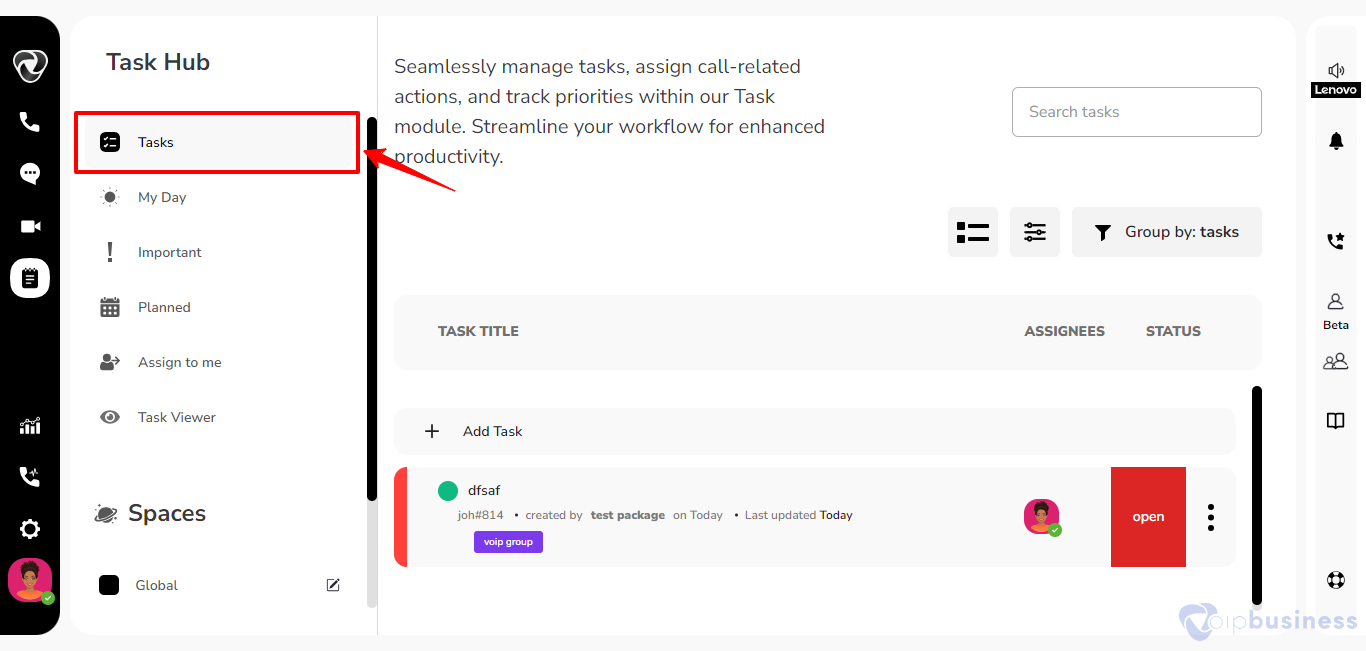
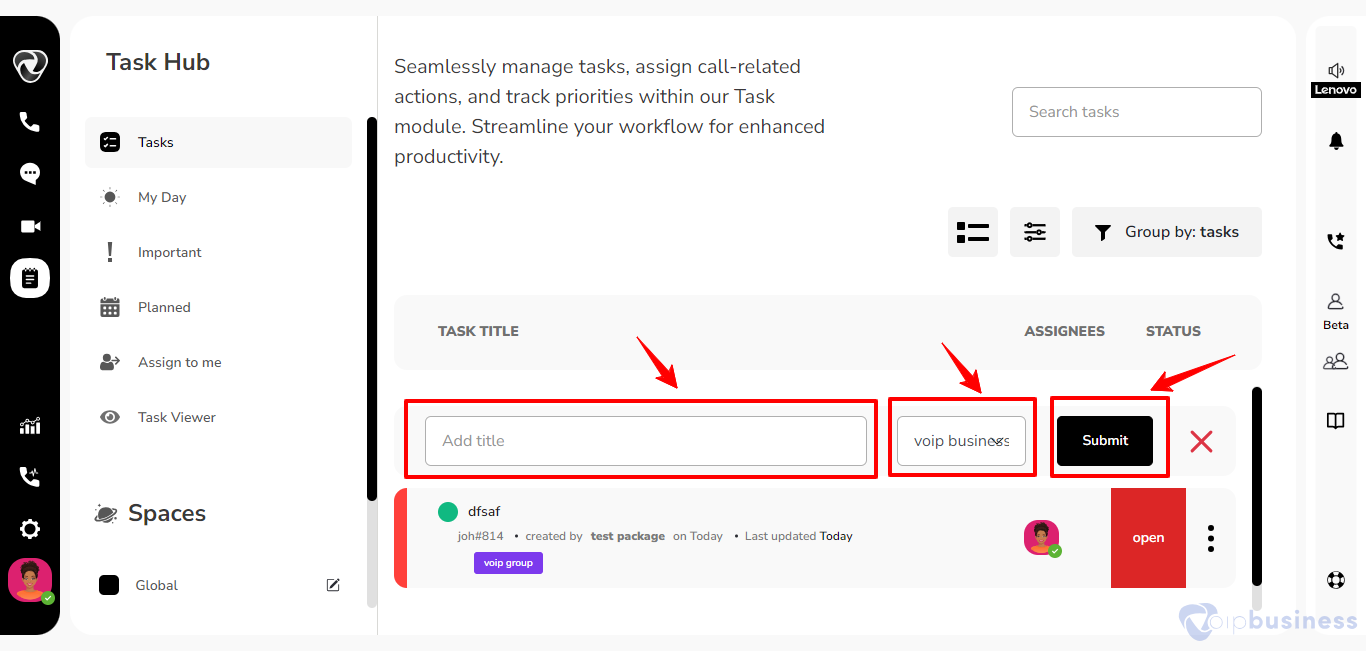
- Subsequently, click on the ‘Add Task’ button.
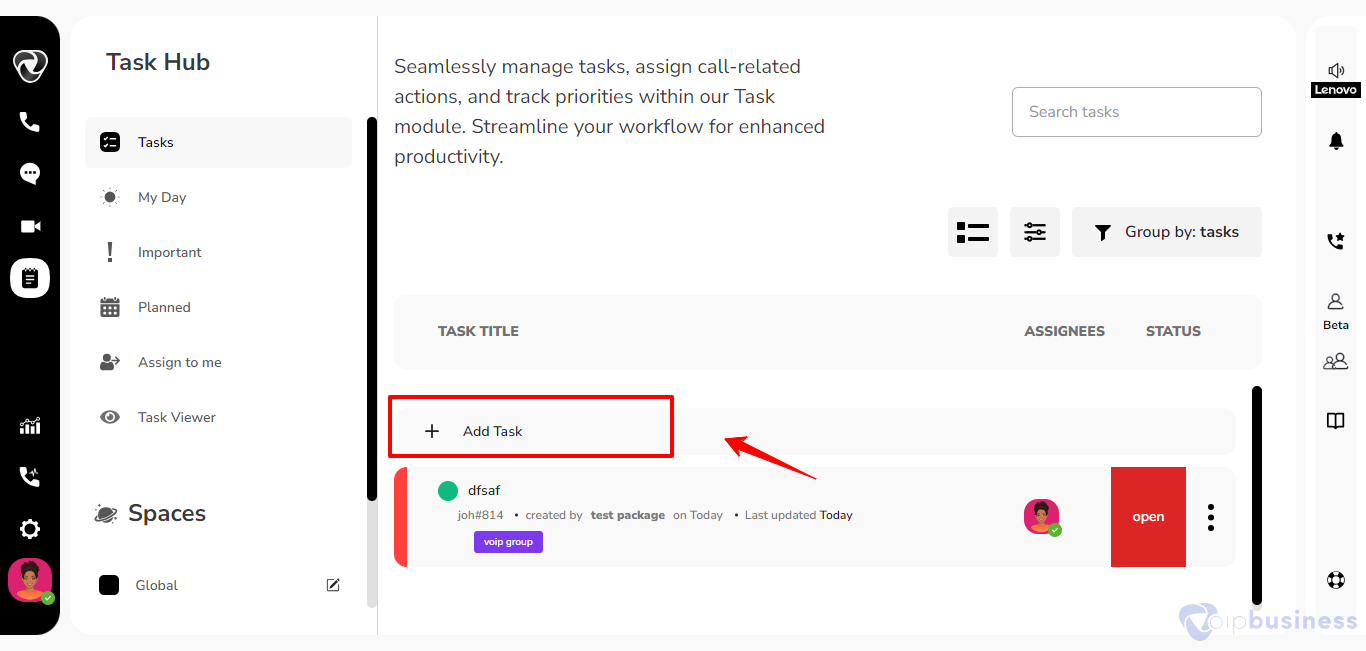
- Allowing you to input the task name and choose the desired space from the options list provided.
- Then click on submit button.
2. Why is task creation crucial for organised workflow?
Task creation is essential for maintaining an organised workflow within the context of a calling system for several reasons:
Efficient Response to Calls:
- Tasks associated with incoming calls can be created, assigned, and tracked within the Task Hub, facilitating a swift and organised response to customer inquiries, issues, or service requests.
Team Collaboration:
- Task creation improves collaboration among team members, enabling them to work together seamlessly in addressing calls, sharing information, and providing a unified and efficient response to callers.
Deadline Tracking for Call-related Tasks:
- The Task Hub includes deadline features, allowing users to set and track deadlines for call-related tasks.
- It ensures that time-sensitive calls are handled promptly, contributing to improved customer service.
Accountability in Call Handling:
- Each task can be associated with a responsible party or team member, encouraging accountability in call handling.
- Team members are aware of their roles and responsibilities, reducing the risk of missed calls or delayed responses.
3. How to edit a task?
- Accessing the Task Hub icon in the left sidebar.
- Selecting the relevant space, and clicking on ‘Task’ to display associated tasks.
- Next, click on the desired task.
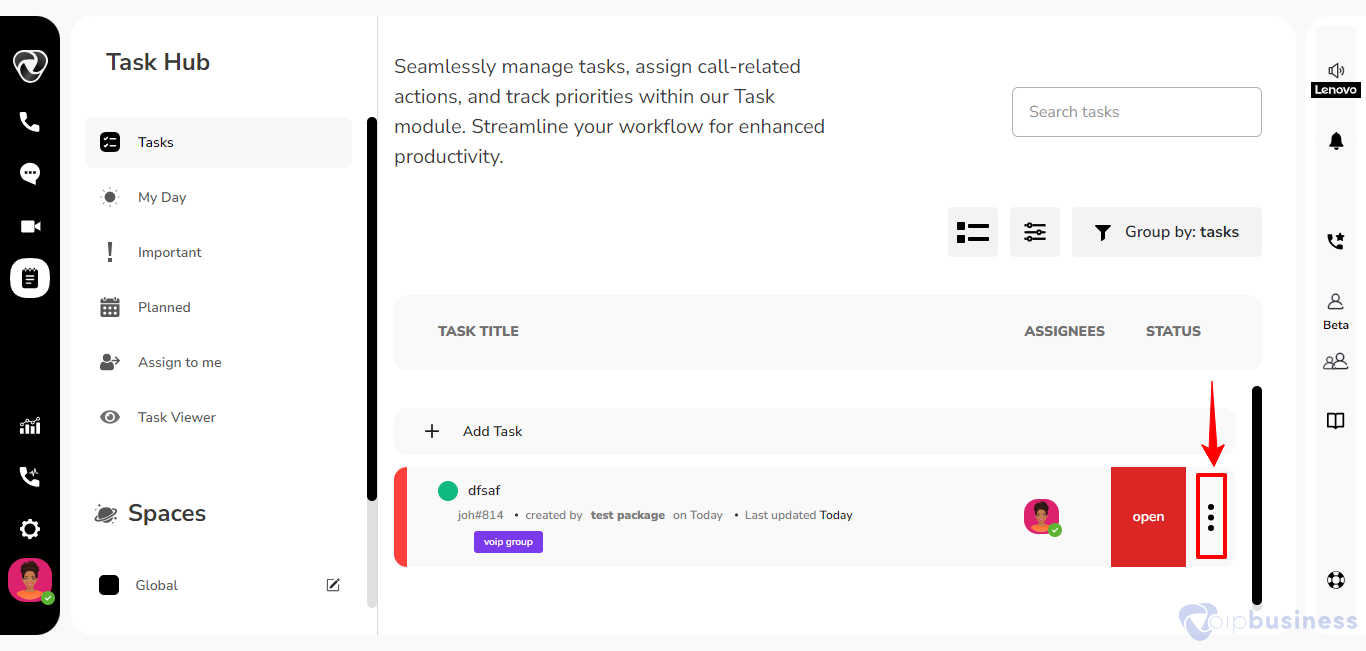
- Providing you with the ability to efficiently edit various parameters.
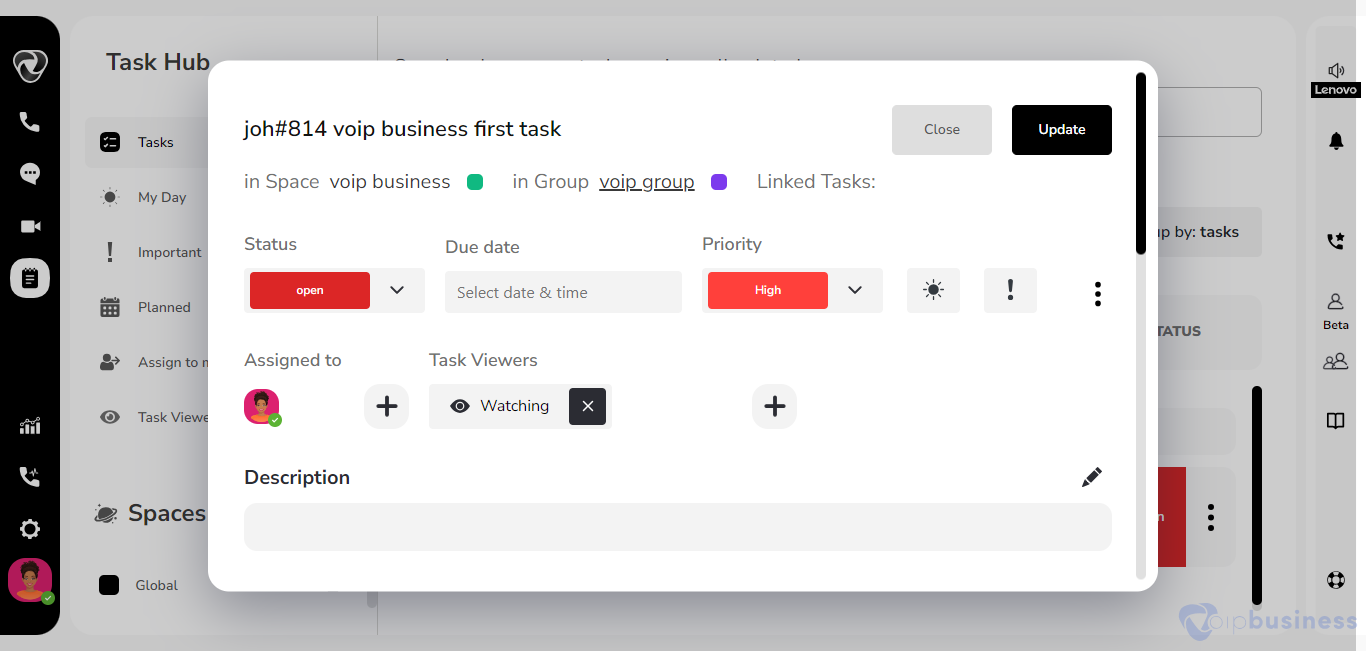
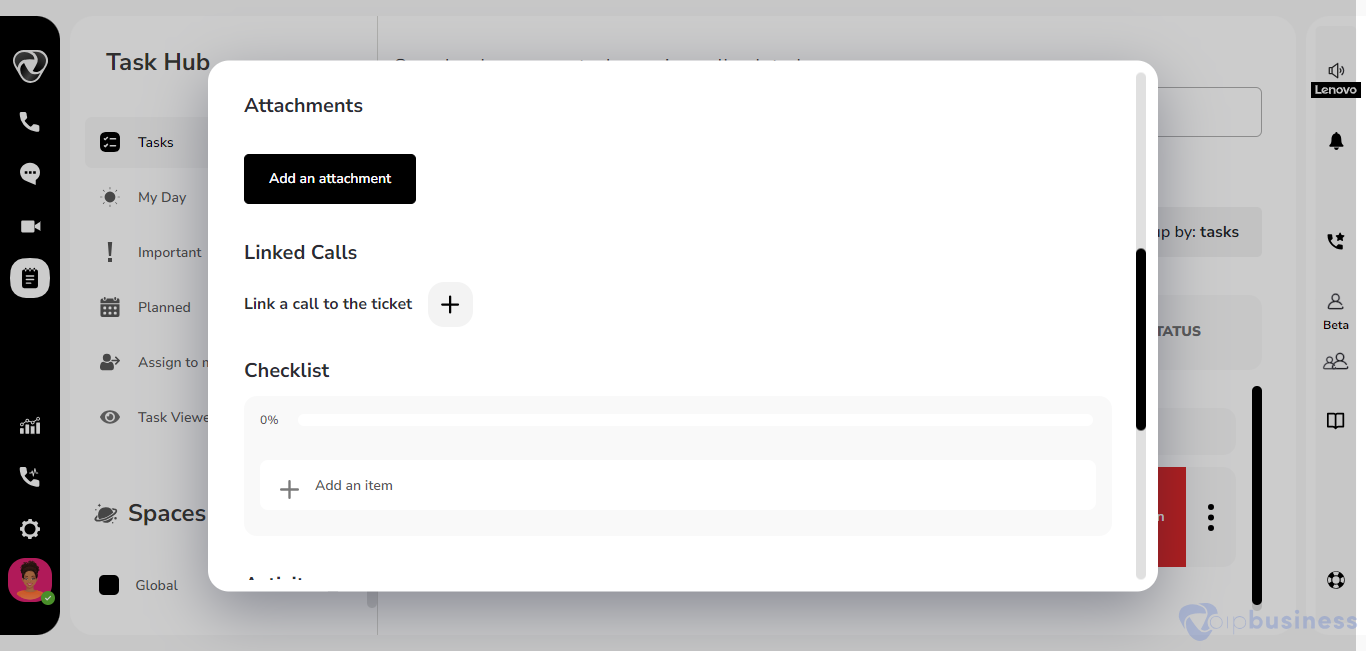
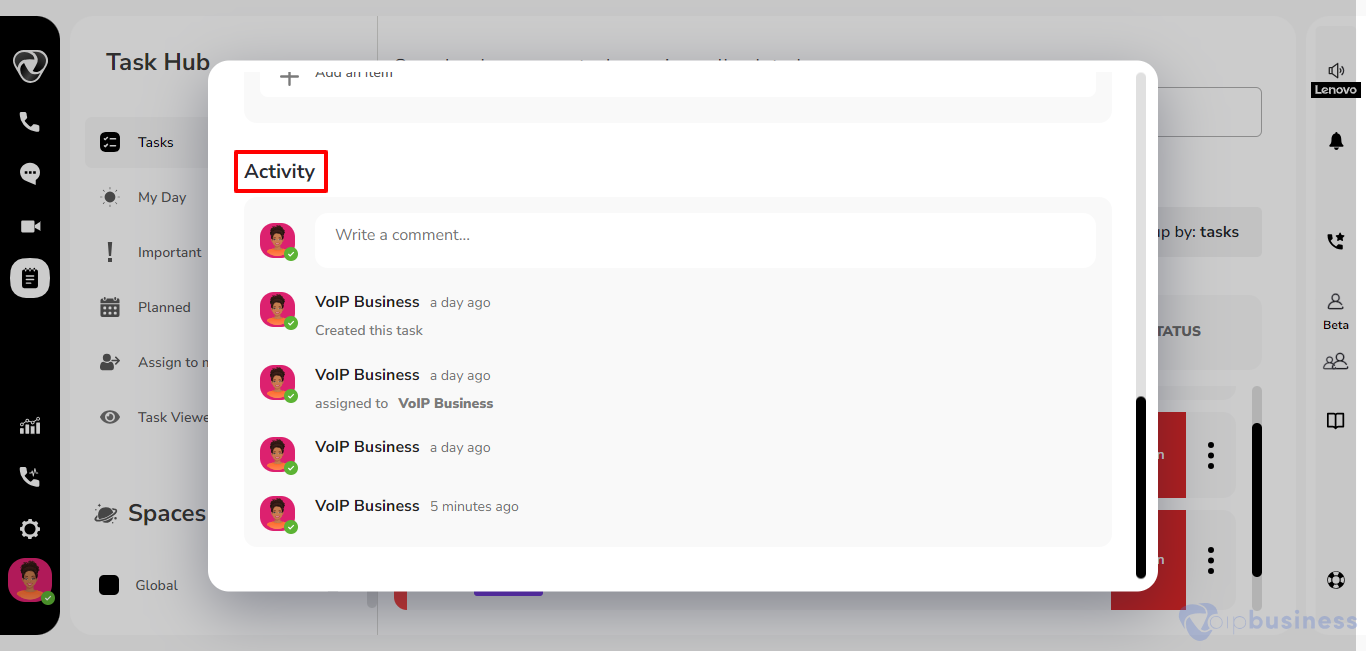
- you can track your task by seeing the activity.