Call Queue (Main Options)
How Can Organisations Optimise The Functionality Of Call Queues Within Our Communication Dashboard?
To make the most of call queues you need to log in to your account. Follow these steps to manage and customise your call queues:
- Log into your account.
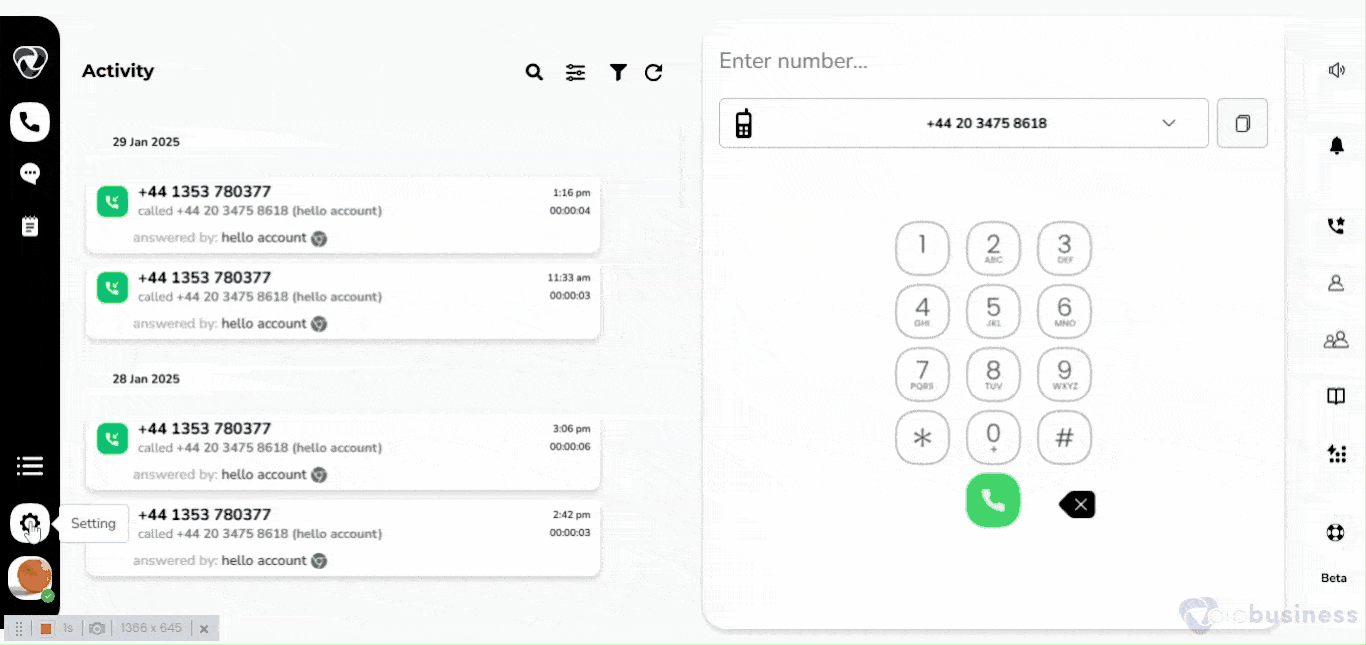
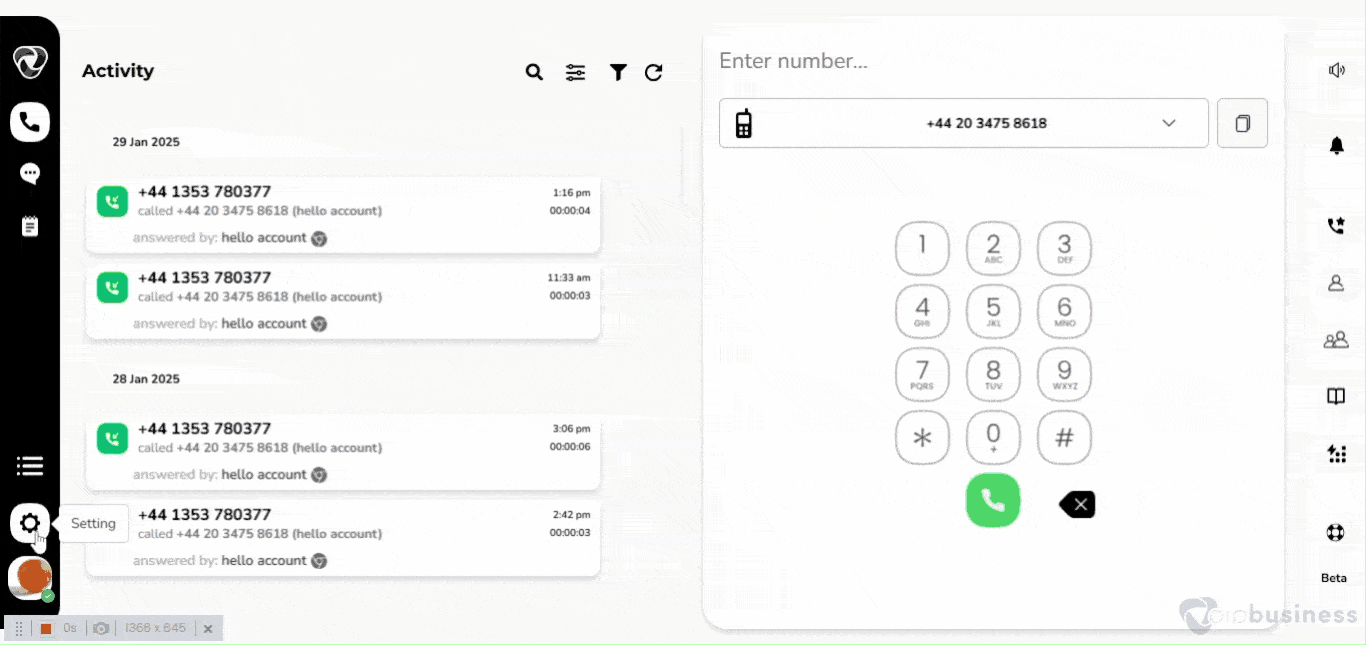
- Go to the “Settings” icon positioned at the left-bottom sidebar.
- Access Call Queue Settings: In the admin settings, select “Call Queue.”
- Choose the call queue you want to manage from the list. A new window will pop up on the right side of your screen.
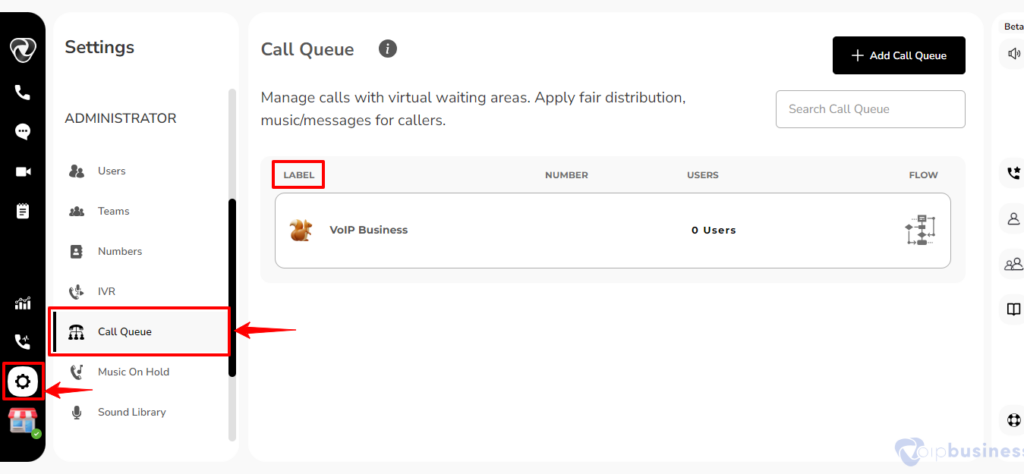
- Scroll down to find the “Main Options” section
- Within this interface, you can view Main options, Agent and timing options and Announcement options.

How to Customise the Main Configuration Settings in a Call Queue?
To change the main settings in a call queue, do the following:
Log into your account using right credentials and follow the steps below
- Click on the “Settings” icon located in the bottom-left sidebar.
- Navigate to the call queue within the administrator settings and select the call queue label.
- Then scroll down to the main options.
- Click on “Configure” button next to main options.
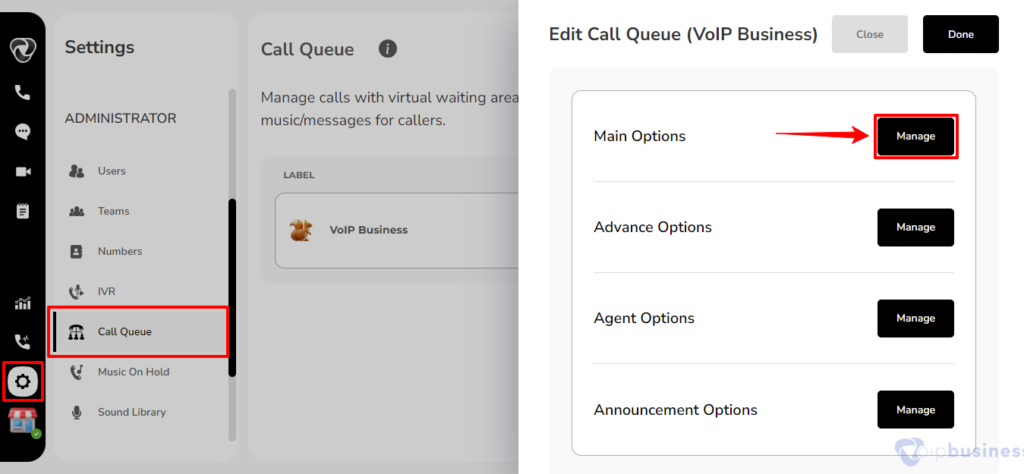
A New Pop-Up Will Emerge On The Right Side, Providing You With The Capability To Oversee The Following Options:
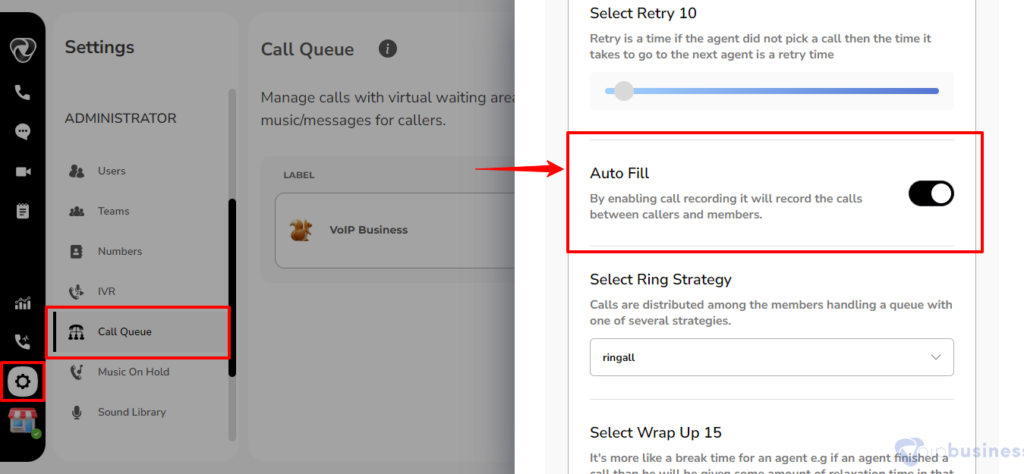
How to Enable Auto Fill?
- Auto fill automatically adds incoming calls to the queue, even if no agents are available right away.
Here’s A Breakdown:
Automatic Queueing:
- When the “auto fill” feature is enabled, incoming calls are automatically placed into the call queue, regardless of the current availability or status of agents.
- It ensures that no calls are missed or left unanswered.
Queue Prioritisation:
- The system may prioritise calls in the queue based on factors such as the order in which they were received, the type of service requested, or any predetermined criteria set by the business.
Wait Time and Messaging:
- Callers placed in the queue through auto fill may experience wait times until an agent becomes available.
- During this time, businesses can use automated messages to inform callers about the estimated wait time, offer alternative contact options, or provide relevant information.
Configurable Settings:
-
The auto fill feature is typically configurable, allowing administrators to define parameters such as the maximum number of calls in the queue, conditions for enabling or disabling auto fill, and any specific messaging to be delivered to callers in the queue.
- Select a call queue you want to edit. Go to Main options and click configure. From here enable auto fill.
How To Select Ring Strategy?
- It refers to the process of managing incoming calls within a call queue by employing different distribution strategies.
-
In a call center or customer service environment, where there are multiple agents (members) available to handle incoming calls, efficient call distribution ensures that calls are handled effectively and that workloads are distributed fairly among the available resources.
- Select a call queue you want to edit. Go Main options and click configure.
- Click change button next to Select your ring strategy. Choose your strategy and click done.
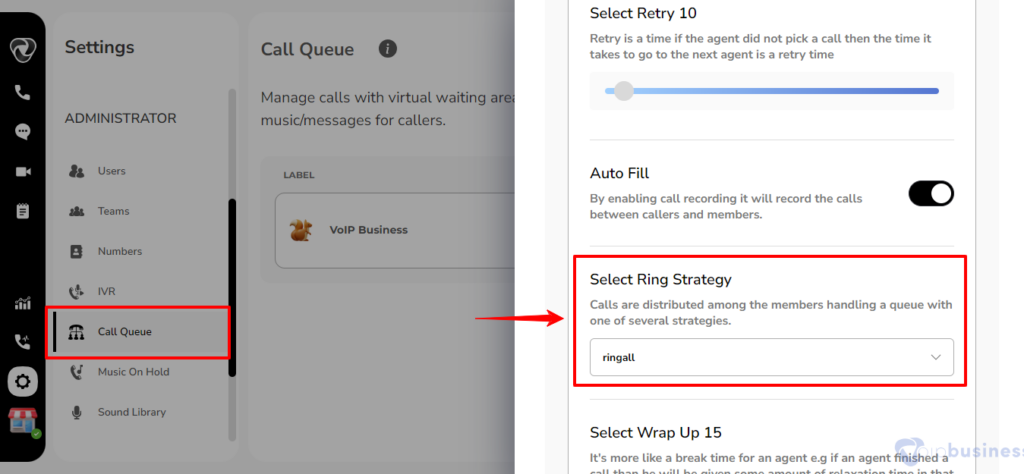
Call Distribution Strategies:
Random:
- Calls are distributed randomly among available agents.
- While this method lacks predictability, it can be useful for preventing patterns that might emerge with more deterministic strategies.
Linear:
- Members are assigned a fixed priority level, and calls are distributed based on these priorities.
- Higher-priority members receive calls before lower-priority ones.
- This is useful when some agents have specialised skills or need to handle more critical issues.
Fewest Calls:
- Calls are directed to the member who has handled the fewest calls or has the least current workload.
- This strategy aims to balance the workload evenly among members.
Ring All:
- The “Ring All” call queue strategy is a distribution method where an incoming call is simultaneously presented to all available agents within a particular call queue.
- This strategy is also known as “Simultaneous Ring” or “Ring All Phones”.
Least-recent:
- It will call the agent who was least recently called
Rrmemory:
- It will remember where we left the last ring pass (which member gets the calls, it will remember it and start the call with the next agent in line).
Wrandom:
- It will work as a random strategy, but it depends on a penalty.
How To Select Music On Hold Class?
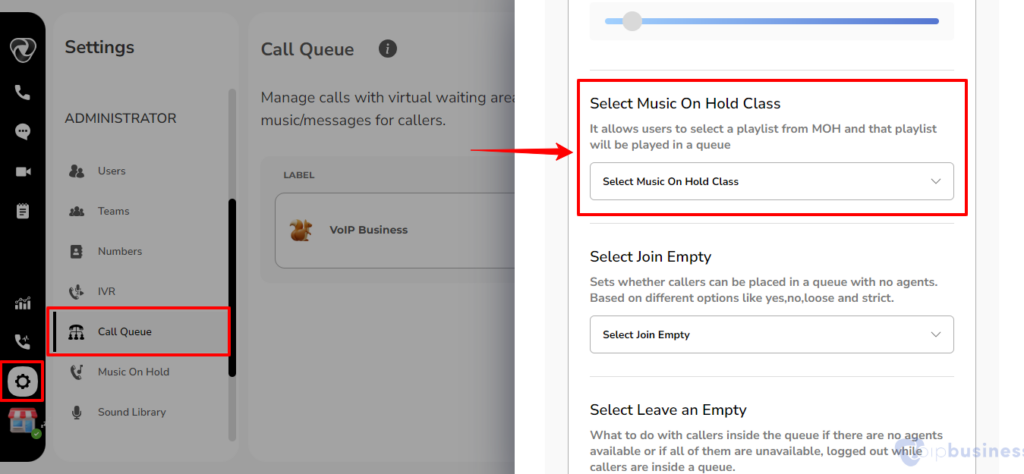
Let’s Break Down The Key Components:
Music on Hold (MOH):
- Music on Hold is a feature in telecommunication systems that plays recorded music or audio messages to callers when they are put on hold during a phone call.
- It is commonly used in scenarios where callers may need to wait before being connected to a live agent or during call transfers.
Select a Playlist From MOH:
- Select a call queue you want to edit.
- Go to Main options and click configure. Scroll down and click change button next to select your music on hold class.
- Choose your music on hold and click done.

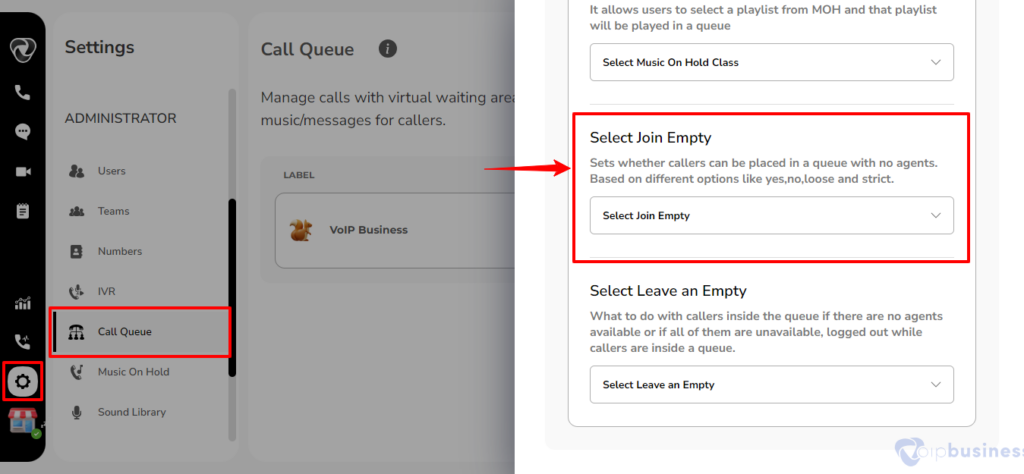
How To Select Join Empty?
- The feature in call queue related to the management of incoming calls within a queue system when there are no available agents to address them promptly.
-
The system incorporates a set of configurable options, namely “Yes,” “No,” “Loose,” and “Strict,” allowing administrators to define the specific behavior of the queue in the absence of available agents.
- Select a call queue you want to edit. Go to Main options and click configure. Scroll down and click change button besides join empty. Choose your option and click done.
Yes:
- When configured to “Yes,” incoming callers can be queued even if no agents are currently available.
- The system will intelligently retain these calls in the queue until an agent becomes accessible.
No:
- In contrast, opting for “No” ensures that callers are not placed in the queue when no agents are available.
- This setting triggers predefined actions, such as routing the caller to a voicemail system or playing a customised message conveying the unavailability of agents.
Loose:
- The term “Loose” implies a more flexible approach, allowing for a certain degree of tolerance in placing callers in the queue even when agent availability is limited.
- This setting aims to balance responsiveness with the system’s capacity.
Strict:
- Conversely, selecting “Strict” denotes a less flexible approach.
- The system, when set to “Strict,” exhibits reduced tolerance for placing callers in the queue during periods of agent unavailability, emphasizing a structured and controlled handling of incoming calls.
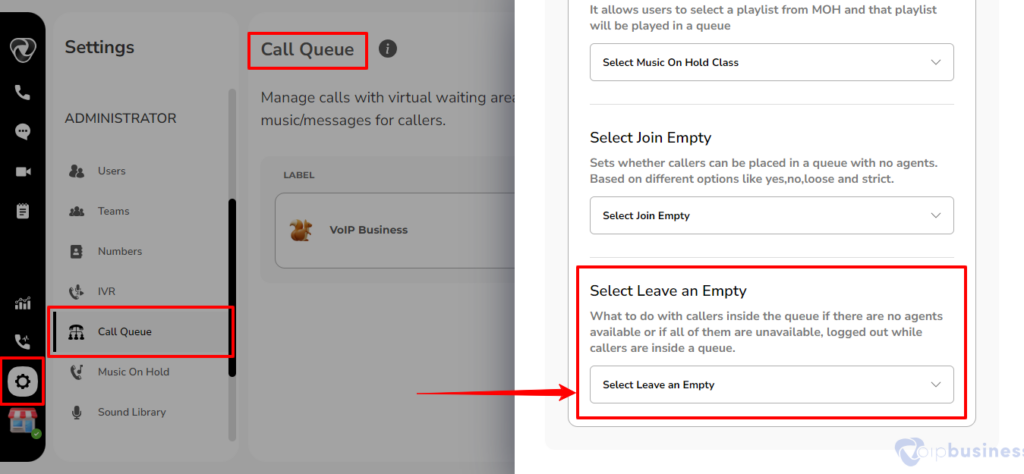
How To Select Leave An Empty?
- In the event of agent unavailability or when all agents are logged out, effective management of caller experiences within the call queue becomes necessary.
- It provides users with a range of options for their queue status.
- Administrators can configure settings to allow users the flexibility to voluntarily exit the call queue when no agent is available, denoted by the “Yes” option.
- Conversely, the “No” option ensures that users are retained in the queue even in the absence of agents.
- Further customisation is facilitated through nuanced choices such as “Loose” and “Strict,” each offering varying degrees of adherence to the queue management protocols.
- These sophisticated options empower organisations to align their call queue strategies with specific operational requirements, ultimately optimising the balance between customer satisfaction and resource utilization in a professional and tailored manner.
- Select a call queue you want to edit. Go to Main options and click configure. Scroll down and click change button besides Leave empty. Choose your option and click done.