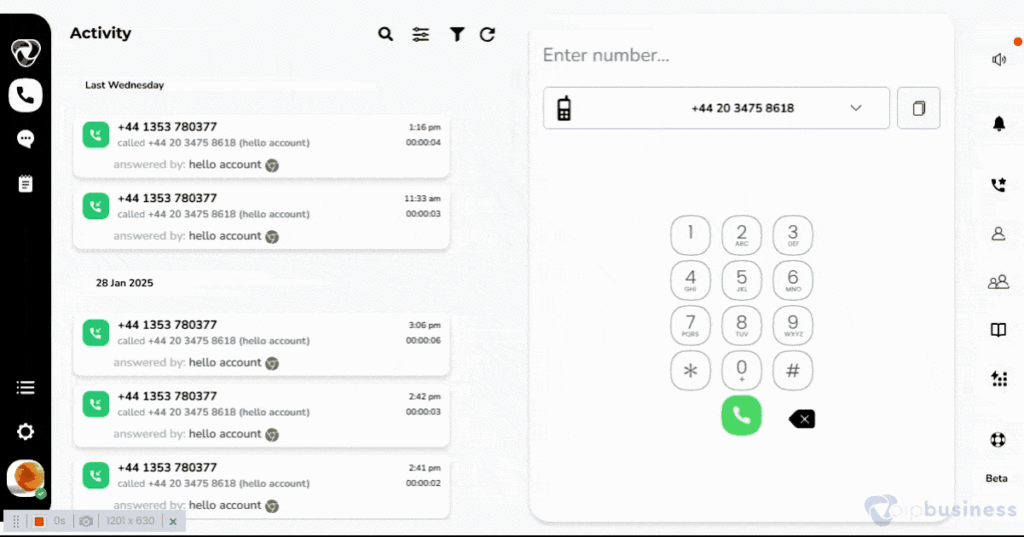
Manage incoming calls while you are on another call by switching between calls or redirecting them to voicemail or another number.
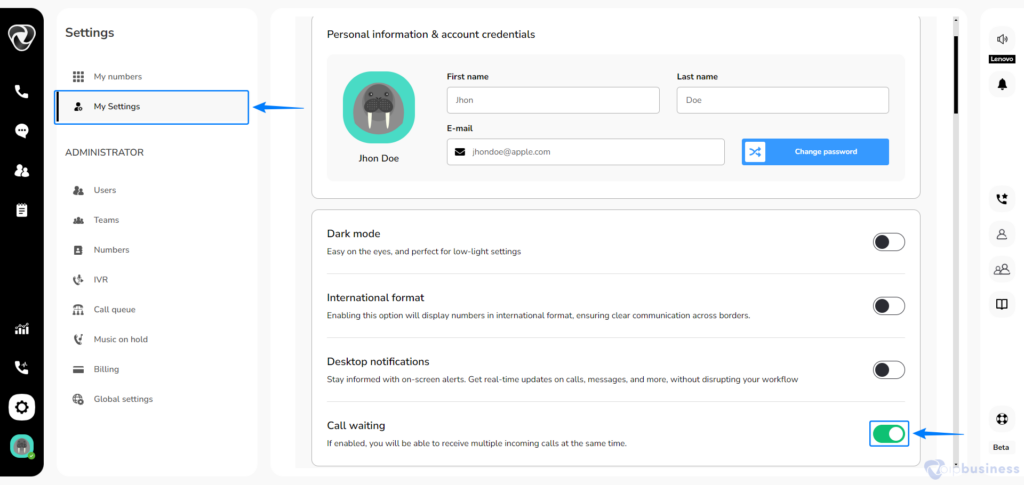
Setting Call Waiting
Within the "My Settings" Scroll down to “Call waiting” and set it “on”.
Now you can manage your calls without interruption.
If you don’t answer the waiting call, it can be sent to voicemail or redirected to another number.
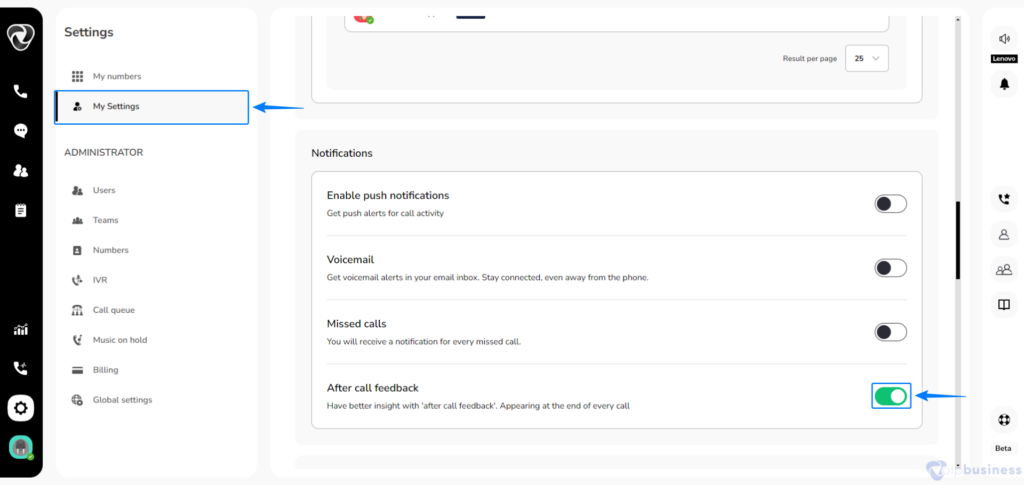
4. After Call Feedback
Ensure call quality, improve customer experience and identify technical issues with after call feedback.
Enabling After Call Feedback
Within “ My Settings” Scroll to “After call feedback” and set it “on”
Now you can get customers feedback easily.
Example :
If you want to ensure that your team delivers high-quality support and quickly identifies any technical issues. To gather customer insights, enable After-Call Feedback:
Simply go to “My Settings”
Scroll down to “After Call Feedback” and set it “on” to get feedback from callers.
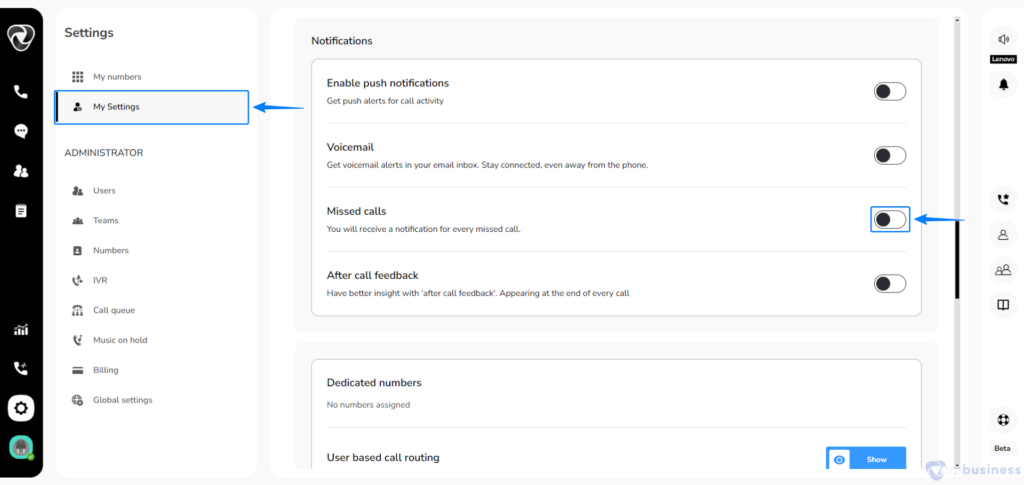
5. Missed Calls Notifications Via Email
Receive timely notifications containing caller ID details for any missed calls, and optimise your responsiveness.
Enable missed call alerts by following the steps below:
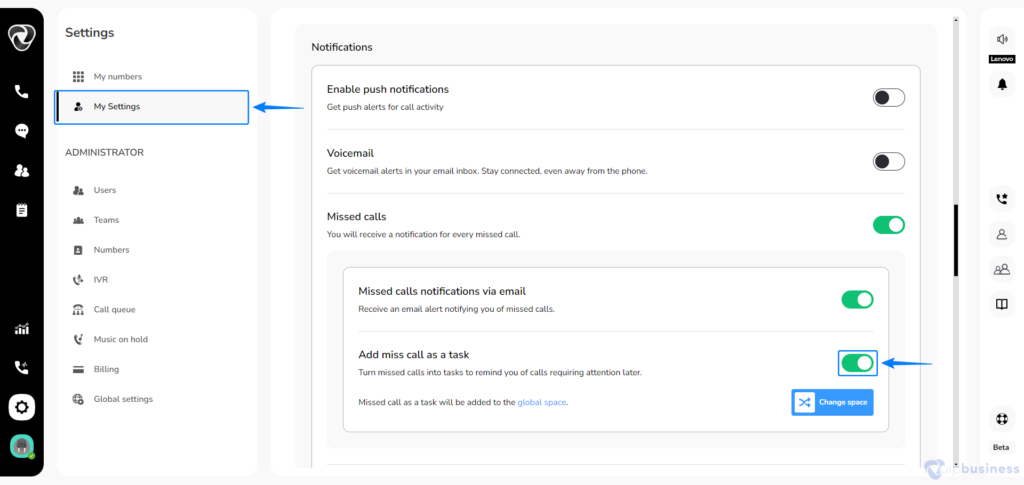
Within "My Settings" Scroll down to “Notifications”.
Set “Missed call” notification to “On”.
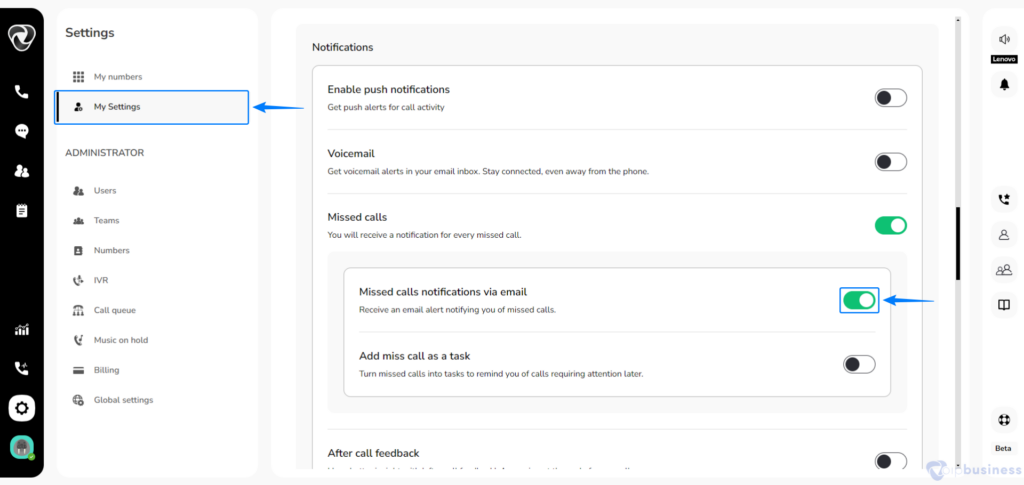
Activate “Missed call notifications via Email.”
Enable “Add Missed call as a task” by setting it “On”.
Assign “Missed Call as a Task” to a “Specific Space”.
Click “Change Spaces” and select your desired space.
Example 1:
Suppose you often receive important client calls but are not always able to receive them . To stay on To stay on top of missed opportunities,enables Missed Call Notifications via Emailnotification in email.
First set “Missed Call notifications “on”
New Options appeared. Now set “Missed calls notifications via email” to “on”
Example 2:
Suppose you were busy with other tasks and could not answer client calls immediately. To ensure no important call is forgotten, enable Missed Call Notifications as Tasks:
First set “Missed Call notifications “on”
New Options appeared. Here set “Add missed call as a task” to “On”.
If you want to Assign this missed call notification as a task to specific “space”, click “change space”.
Select a “space” and click “close”.
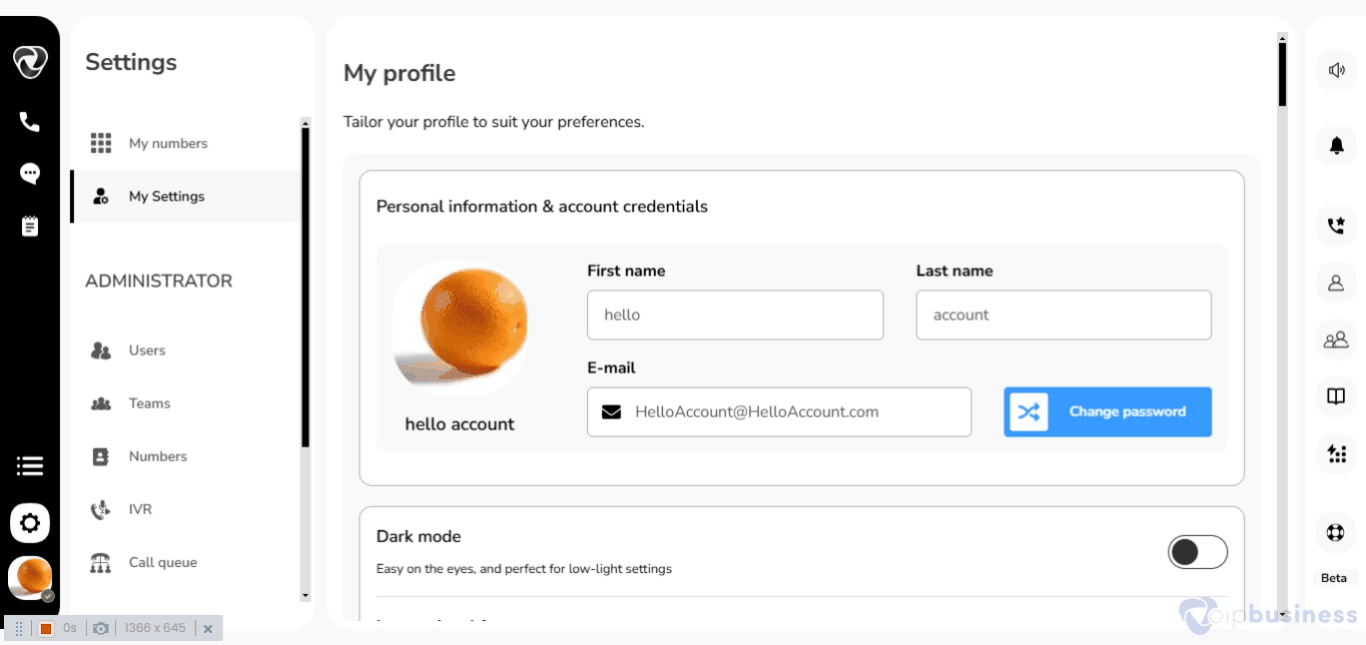
6. Presence Modes
Presence mode allows users to show their real time availability to other users.
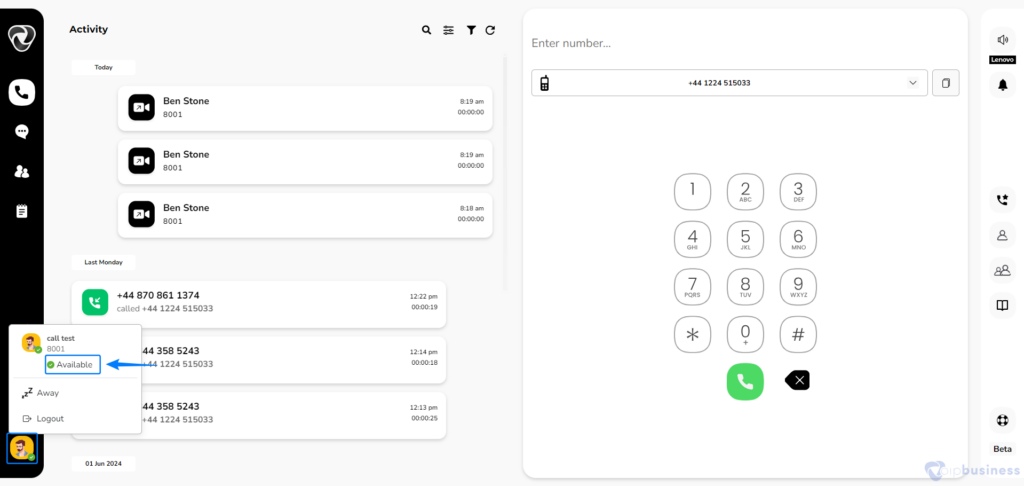
Tap your profile icon in the bottom-left corner.
Click on your availability status.
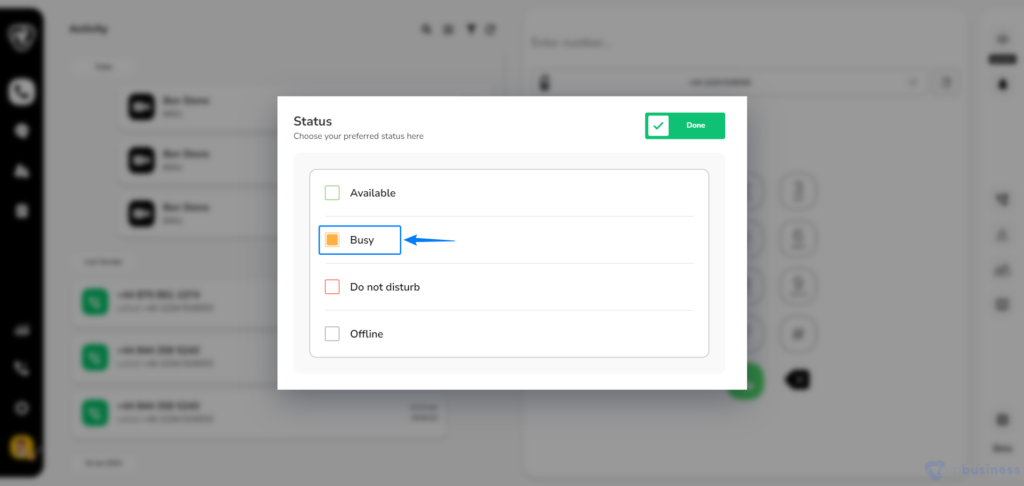
Select the “desired presence mode” and click “Done”.
Following Modes Are Available in VoIP Business:
Available: Ready to receive calls.
Busy: Limited availability.
Do Not Disturb: No interruptions.
Offline: Not available.
Set statuses via profile icon on the left sidebar, as shown:
Example:
Suppose you are busy working on an important task and not able to attend any call.
Tap on your “profile picture”. Click on availability status.
In the appeared options select “busy” and click “Done” so that you can focus on your work.
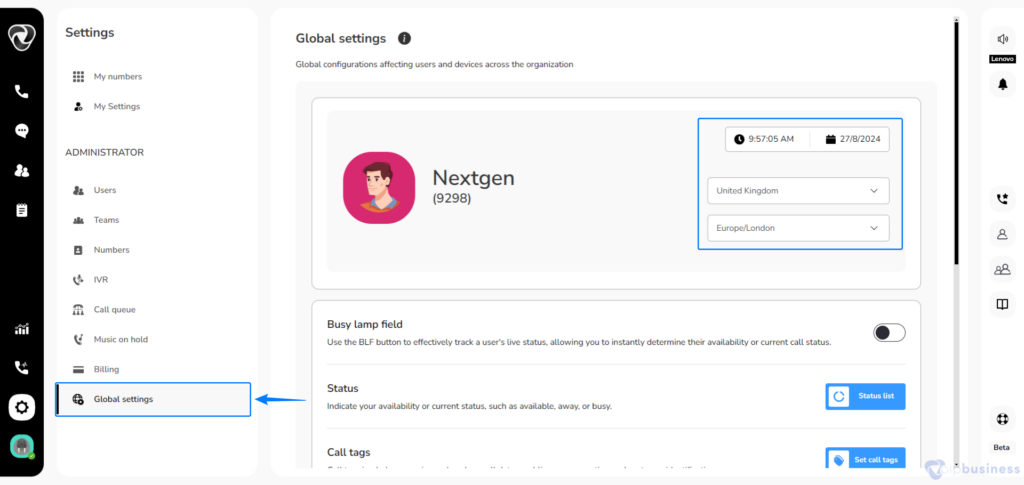
7. Time Zone
Time zone ensures call logs, voicemail timestamps, and scheduling align with the user's local time.
Click on “settings”
Navigate to ‘Global Settings’.
On the right side of your screen click on “drop down” icon next to “country name” and “Time Zone”
Setting the correct time zone ensures accurate synchronization across your communications.
Example:
Suppose you manage a global team and need accurate call logs and voicemail timestamps. To ensure everything aligns with the local time, update your Time Zone settings by:
Go to “Global Settings”. On the right side of your screen select the “country” and “Time Zone” and you are done.